This activity resource shows you how to make a simple plaster cast of a 3D object (we used a plastic toy duck) and then use pressed clay to make copies of the object from the plaster mould.
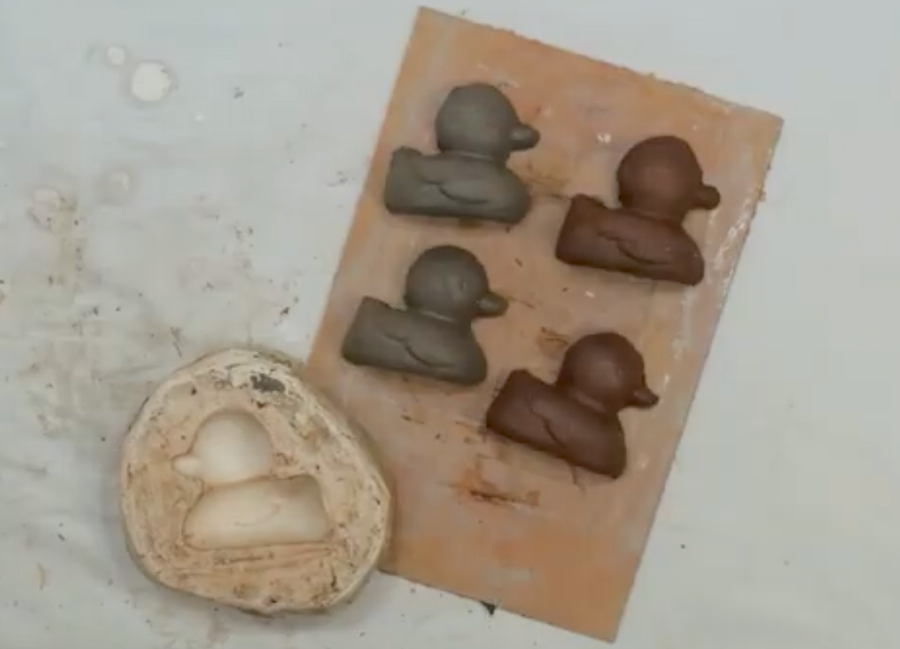
Plaster mould and clay reproductions
This activity has been designed for KS 2 and KS 3 / CfE Level 3 & 4 students, but could also be used with older students, or by lifelong learners or families.
Although casting in sculpture is usually associated with bronze or plaster (molten metal or liquid plaster is poured into a mould), the technique of making a mould in plaster and filling it with clay is one of the simplest ways of reproducing an object.
Health and safety when using plaster
Plaster can be messy with potential health and safety issues so if working with younger students, teachers should mix and pour the plaster. Older students should be supervised at all times.
Plaster dust can get into the eyes or nose so ensure that it is handled carefully and never allow students to mix plaster with their hands.
Materials
You will need:
plaster of Paris
clay
a 3D object to cast (use a simple object such as a plastic toy)
thick card or thin board (a clipboard is ideal) for the base
a mixing bowl or jug
an old wooden spoon or stick to mix the plaster
water
clay tools
Method
This time-lapse video shows you how to make a plaster mould from a 3D object and then use clay to make a simple sculpture.
Watch the video and then follow the step-by-step instructions below.
Instructions
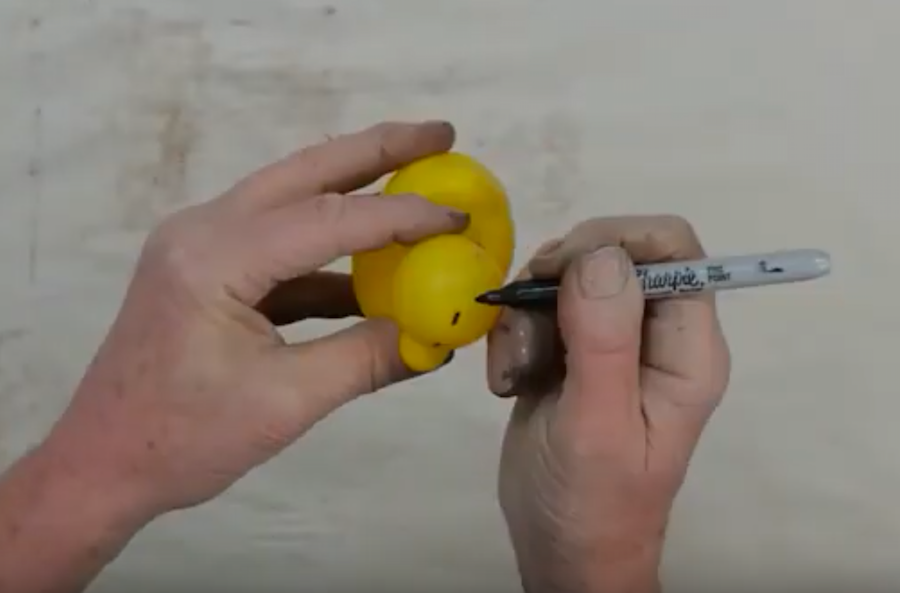
Step 1. Mark the halfway point of your object
Mark the halfway point of your object with a pen. This will help you during the next step when you begin to add clay around the object.
Mark the halfway point
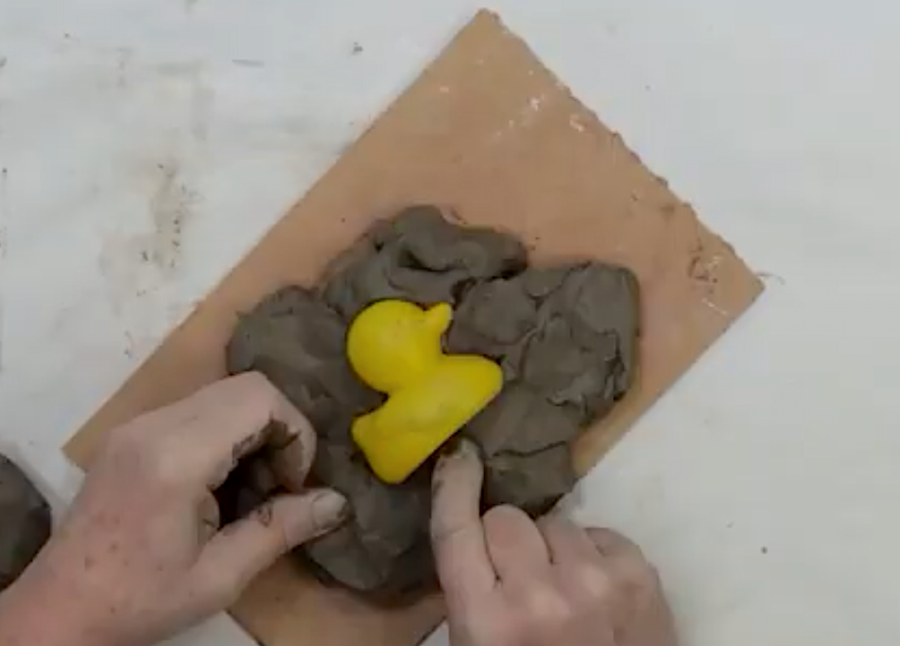
Step 2. Add clay around your object
Place your object on the board and begin adding around the object with clay up to the marked halfway point.
Build clay around your object
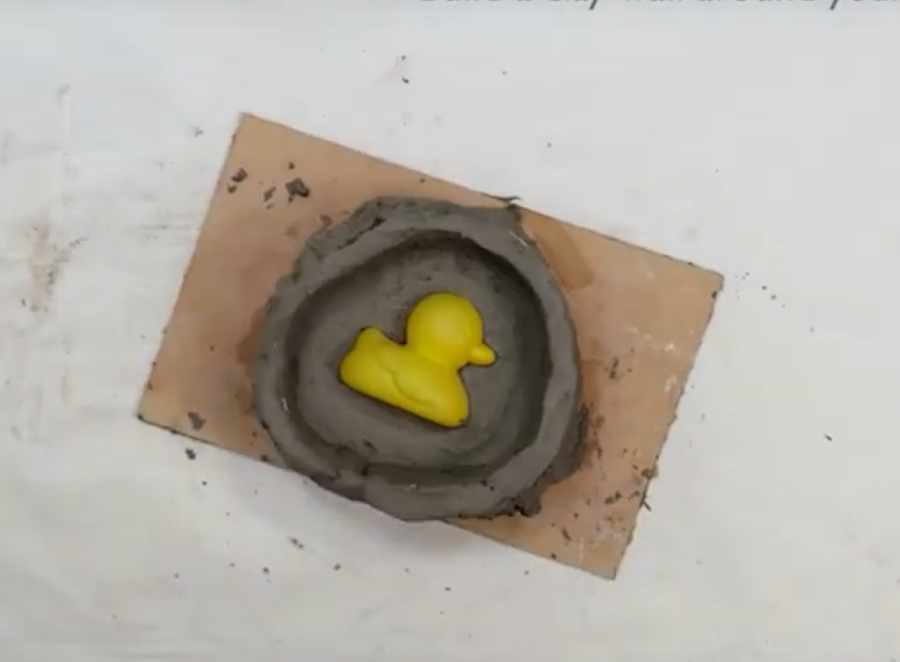
Step 3. Build a wall around your object
To make a wall, roll a snake-like coil long enough to surround your clay base (approx 2 cm in diameter).
Attach your wall to the clay base. Your wall should be at least 1 cm taller than your object.
Make sure it is sealed with no cracks – this will prevent the liquid plaster from leaking in Step 5.
Add a clay wall
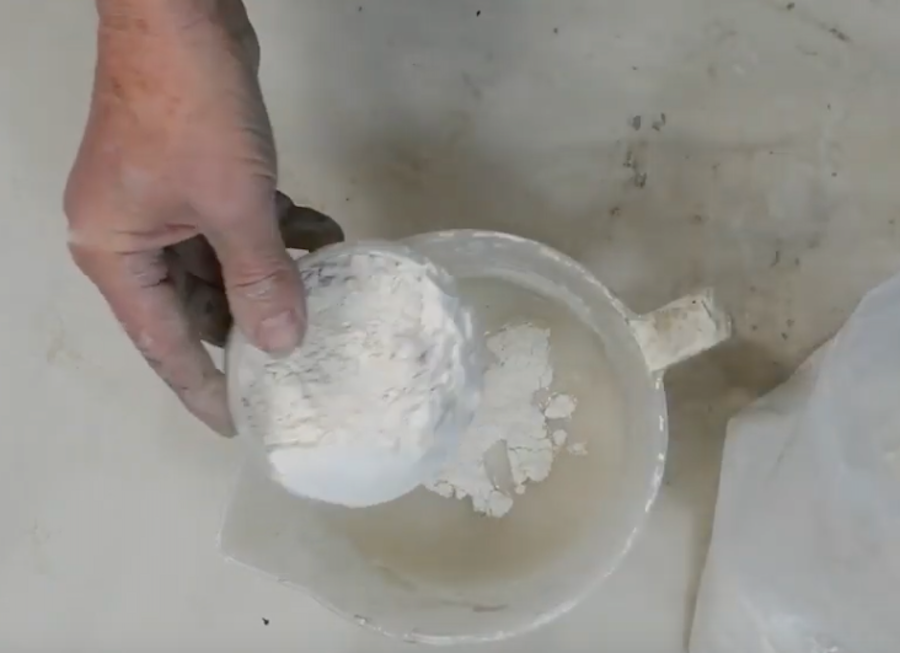
Step 4. Mix the plaster
Fill your container with 300 ml of water and carefully pour in the plaster powder until a mound forms just above the water level.
Adding plaster to the water
Mix the plaster and water together with a wooden spoon until it becomes a smooth consistency, like a milkshake.
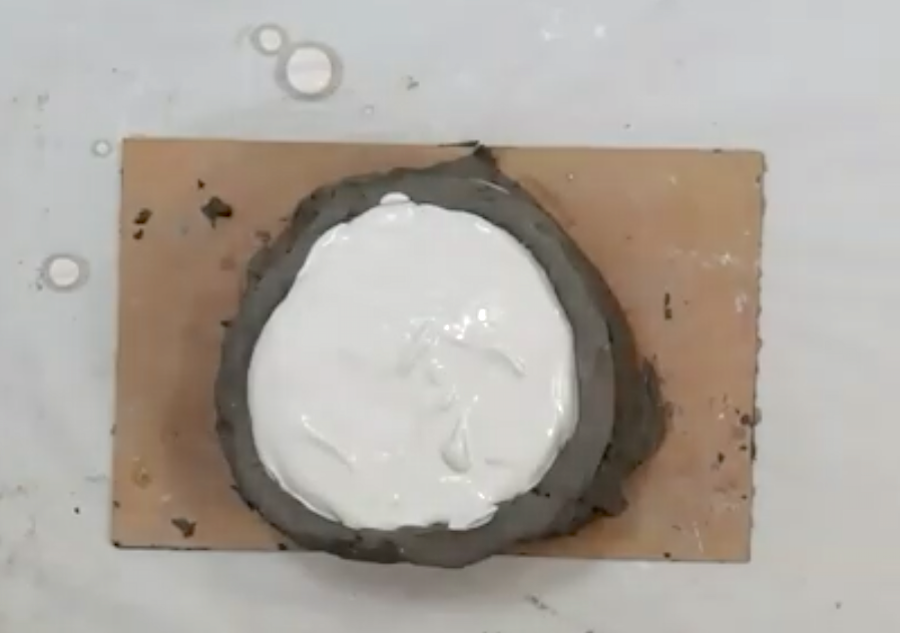
Step 5. Pour the plaster into the mould
To avoid air bubbles forming, slowly and carefully pour the mixture into the mould and leave it to set.
The plaster will begin setting immediately after it has been mixed, so be prepared to pour the mixture straight away. The plaster will begin to heat up as it sets.
Plaster setting in the mould
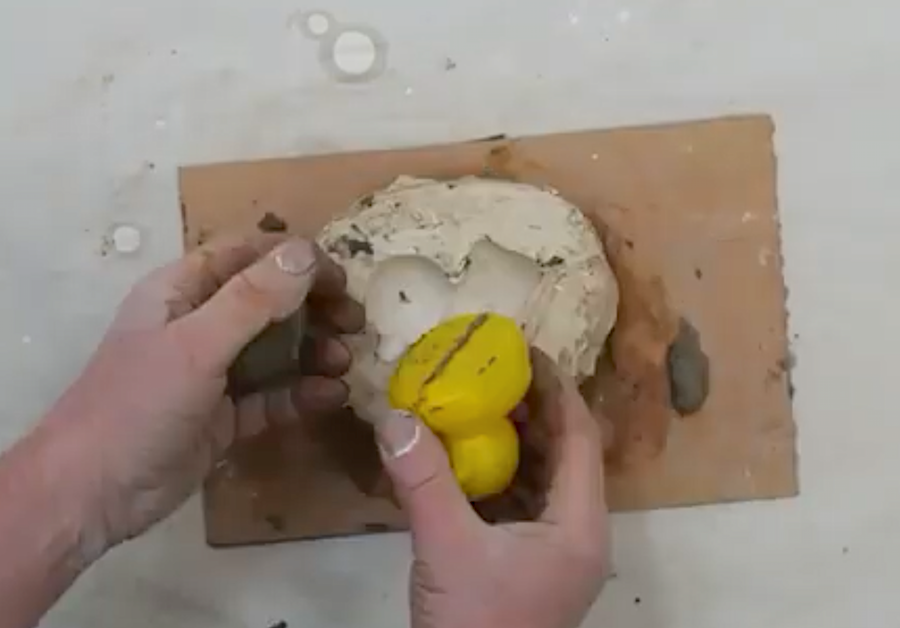
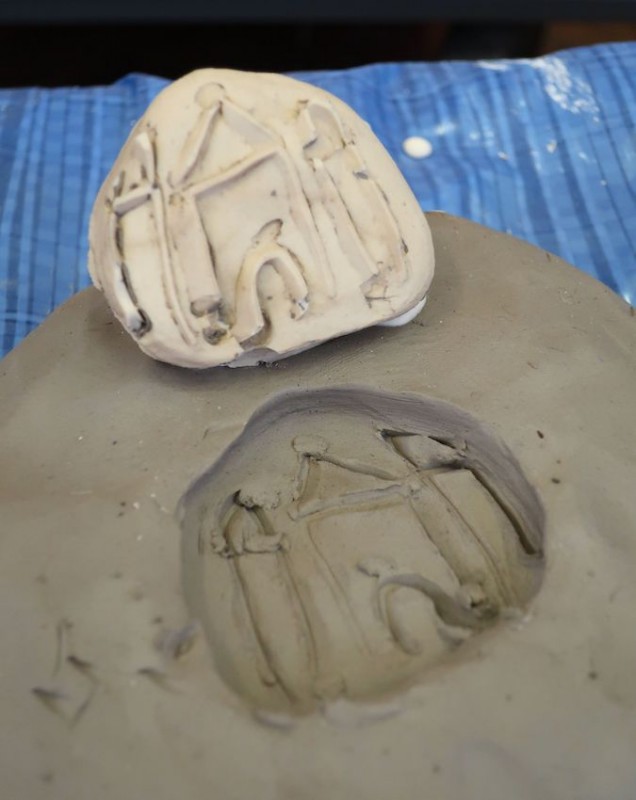
Step 6. Remove the clay and the object from the mould
Once the plaster has set, remove the clay, along with the object. Use your clay tools or sandpaper to smooth down any rough edges of the plaster mould.
Remove your object
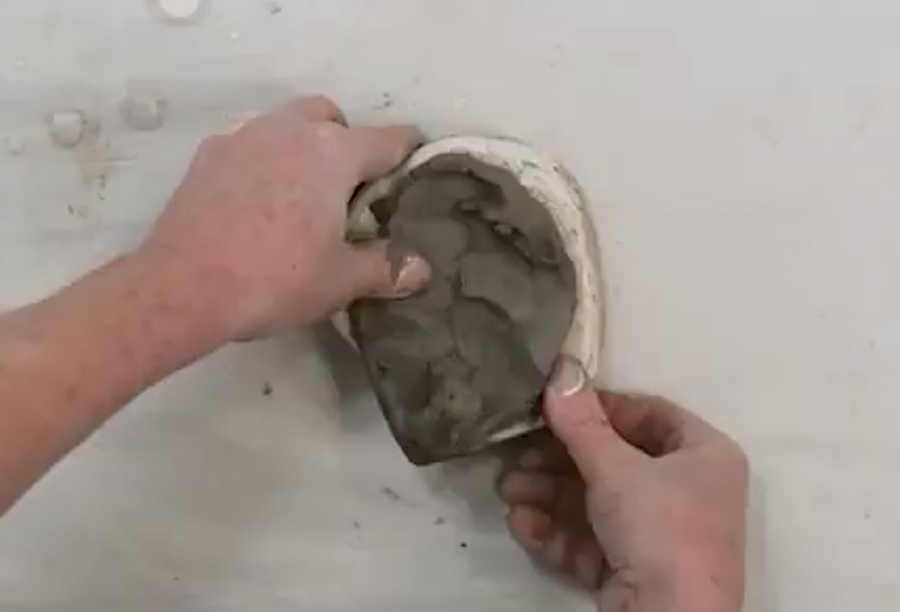
Step 7. Create your copy
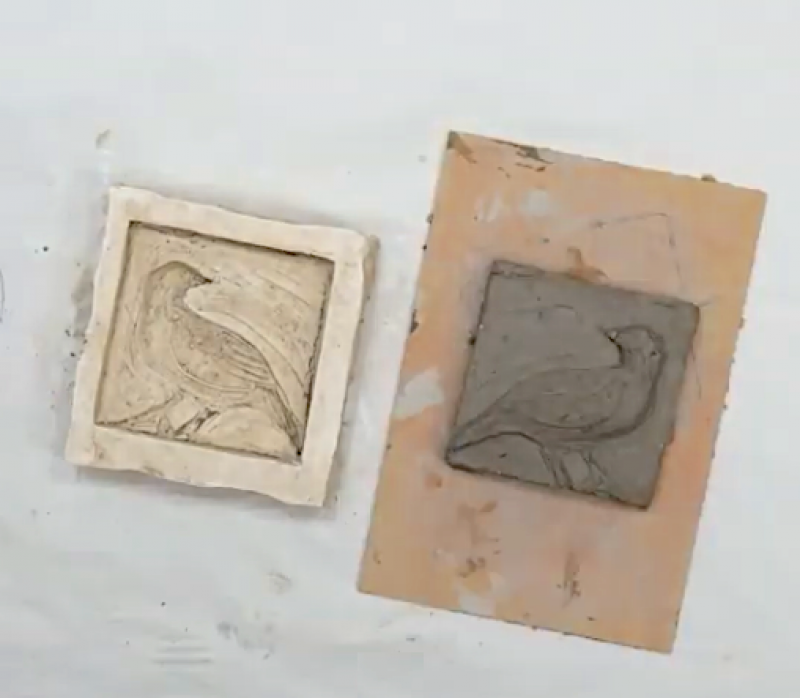
Press clean clay into the plaster mould to create your copy of the original 3D object.
Press clay into your mould
Now that you have a plaster mould, you can create multiple copies of your original.
Plaster mould and clay reproductions
Have a go at casting other objects. Once you know the technique you can cast almost anything...!
What will you do with your multiple objects?
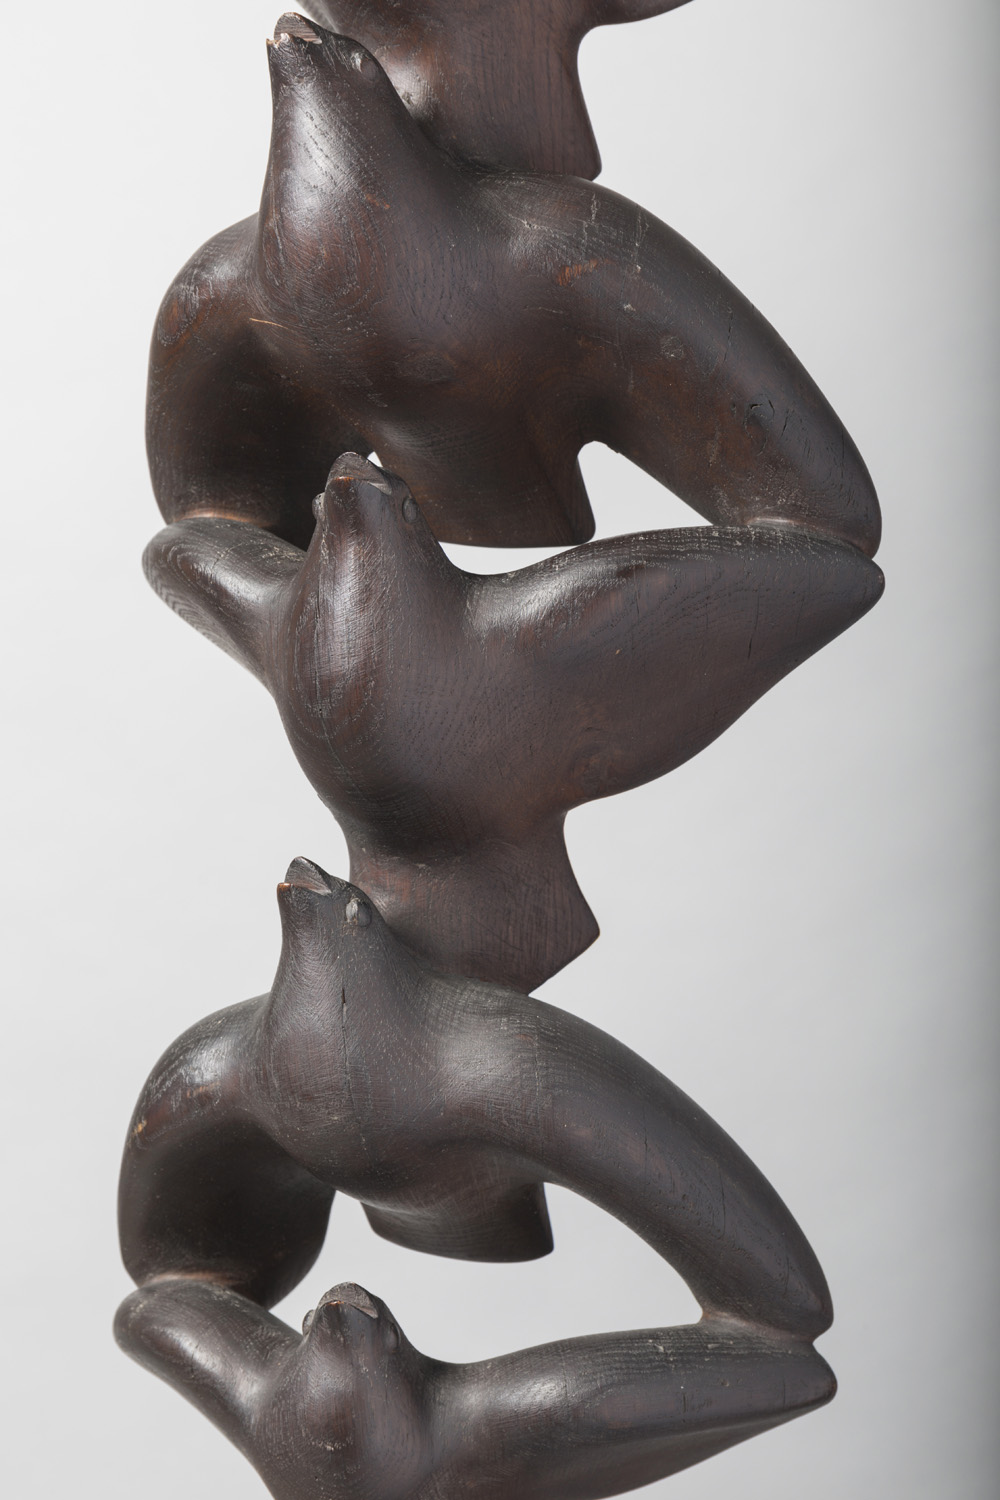
Once fired or hardened, use your clay multiples to make a sculpture by attaching them together.
Explore different formations and see what happens!
In this activity, we cast half an object – effectively creating a relief sculpture.
To cast an object in a round, a mould in two or more sections would be required. Use the technique outlined in this activity resource to make plaster moulds of each side of your object – and then join the clay sections together after casting.
Cast a plaster sculpture
In this activity, we made a mould from plaster and pressed clay into it.
You could also make your mould from clay and use plaster to cast from it. The Art UK activity 'Cast a simple sculpture' provides ideas and instructions for doing this. It was designed for KS 2 students but could be adapted for older age groups.
Many contemporary artists use silicone to make moulds as it allows for finer details. Silicone is safe for students to use but is more expensive than clay or plaster.
To find out more about using silicone to reproduce 3D objects, explore this Tate resource: