Texture collage inspired by David Nash's 'Multi-Cut Column'
About this resource
How can shapes and textures found in nature be used as inspiration for art?
Artist David Nash makes sculptures and drawings inspired by nature and the landscape near his home in rural North Wales.
This resource introduces the artist and his work and explores how he makes use of local materials and the shapes and textures he sees around him for his wood sculptures. It also provides suggestions for art activities inspired by David Nash and nature.
Use this resource to:
find out about David Nash's wood sculptures and drawings
investigate some of the qualities and properties of wood
explore how shapes and textures in nature can be used as inspiration for art
have a go at drawing and collage activities inspired by David Nash
This Art and Design resource offers a series of activities that can be used together as a lesson plan or as individual components to adapt and integrate into your own scheme of work. It is written for progression step 3/Key Stage 2/Level 2, but some activities and information within the resource may also suit progression step 2/KS 1/Level 1.
Art and design - I have the opportunity to choose and explore an extended range of media and technologies to create images and objects, comparing and combining them for specific tasks (EXA 2-02a) - I can create and present work that shows developing skill in using the visual elements and concepts (EXA 2-03a) - Inspired by a range of stimuli, I can express and communicate my ideas, thoughts and feelings through activities within art and design (EXA 2-05a) - I can respond to the work of artists and designers by discussing my thoughts and feelings. I can give and accept constructive comment on my own and others' work (EXA 2-07a)
Art and design - Be stimulated and inspired by other artists - Design and make three-dimensional objects for a variety of purposes - Apply the elements of the visual, tactile and sensory language of art
Exploring the expressive arts is essential to developing artistic skills and knowledge and it enables learners to become curious and creative individuals.
Progression step 3:
- I can explore and experiment independently and demonstrate technical control with a range of creative materials, processes, resources, tools and technologies showing innovation and resilience.
- I can explore the effects that a range of creative techniques, materials, processes, resources, tools and technologies have on my own and others' creative work.
- I can explore how creative work can represent, document, share and celebrate personal, social and cultural identities.
- I can explore and describe how artists and creative work communicate mood, feelings and ideas and the impact they have on an audience.
Responding and reflecting, both as artist and audience, is a fundamental part of learning in the expressive arts.
Progression step 3:
- I can give and consider constructive feedback about my own creative work and that of others, reflecting on it and making improvements where necessary.
- I can reflect upon how artists have achieved effects or communicated moods, emotions and ideas in their work.
Creating combines skills and knowledge, drawing on the senses, inspiration and imagination.
Progressions step 3:
- I can draw upon my familiarity with a range of discipline-specific techniques in my creative work.
- I can identify and respond creatively to challenges with resilience and flexibility.
- I can safely choose and use the correct creative tools and materials with some consideration for others.
Who is David Nash?
David Nash (b.1945) was born in Surrey but moved to Blaenau Ffestiniog in North Wales in 1967 where he lives and works. The former slate-mining town of Blaenau Ffestiniog is circled by mountains and forests as well as mounds of black waste material from its slate-mining heyday. His sculptures and drawings are inspired by the local landscape, his sense of place and man's relationship with nature.
David Nash's love of North Wales and its landscape began as a child when he visited his grandparents who lived there. Cynefin, a Welsh word meaning habitat and a personal sense of place and belonging, is important to Nash and he sees making sculpture as a deeply collaborative process between the artist, a place and its material.
'To really meet a place you've got to work in it. You've got to work its materials.' – David Nash
Nash mainly works with wood which comes from trees growing near his home. Although some of his sculptures suggest geometric forms, many of them are inspired by shapes from nature and by the forms and surfaces of the trees themselves.
An environmental artist
'I thought the most politically powerful statement to make as an artist was to engage with the environment. That was what we had to do as human beings' – David Nash
As well as being inspired by the landscape, looking after nature is a dominant theme that runs through David Nash's work. A key aspect of his admiration for trees is that 'trees take just enough and give back more' (which is something that humans could learn from!).
His concern for the planet and its delicate ecosystem influences his decisions about the materials and many of the processes he uses. All the wood for his sculptures comes from trees that have fallen naturally or have been felled due to age, disease or safety and he often recycles the natural materials he uses.
Activity: first thoughts
Look at these sculptures by David Nash with your class. (Click the images to see larger versions.) Encourage students to think about the shapes and textures of the sculptures. Use these discussion prompts if helpful:
Describe what you can see in these pictures.
What do you think the sculptures are made from?
Do the shapes remind you of anything?
Do you think the surfaces of the sculptures are rough or smooth?
How big do you think the sculptures are?
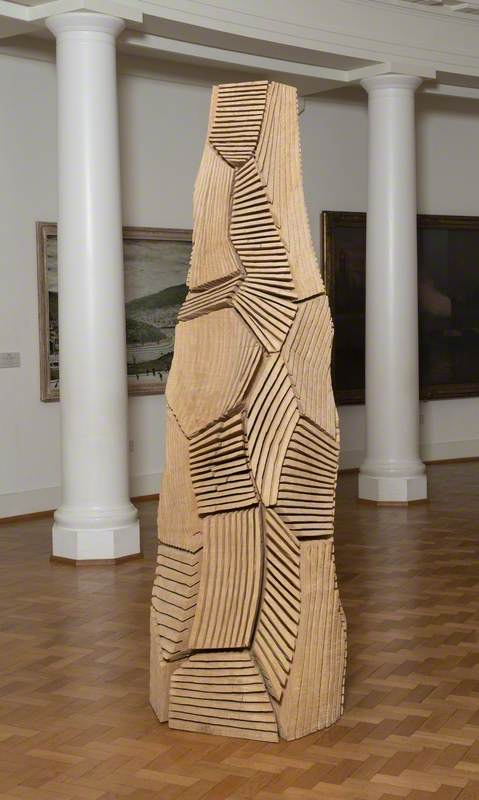
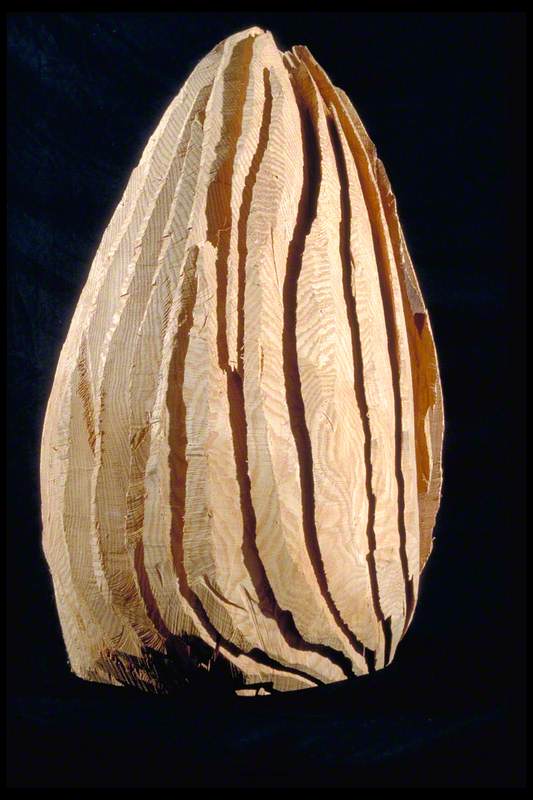
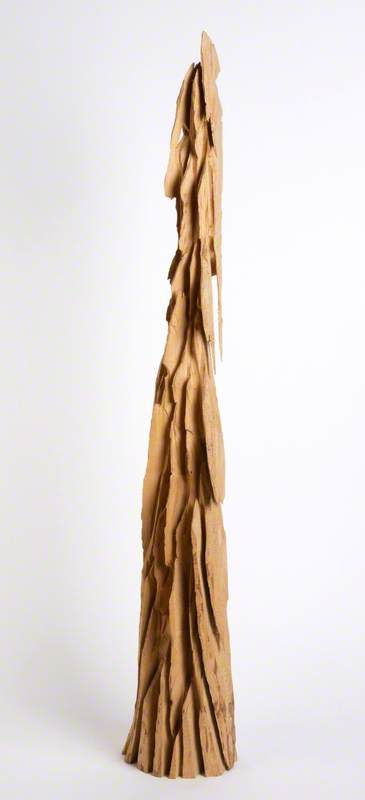
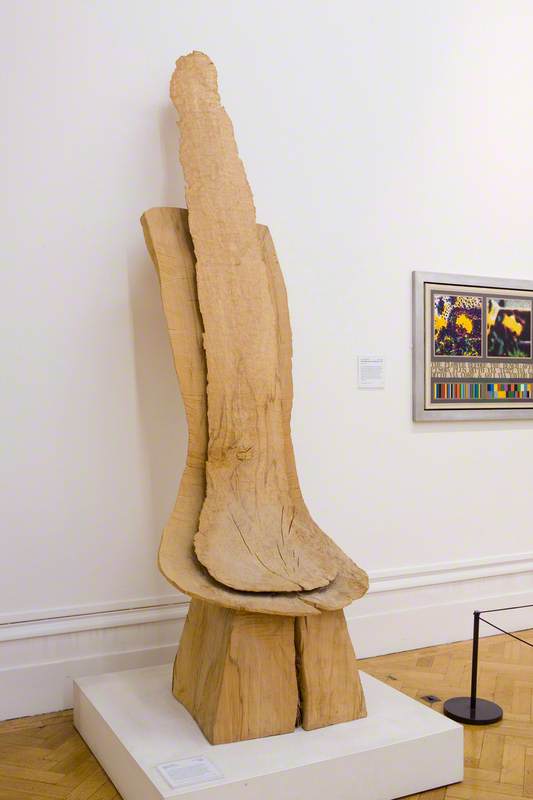
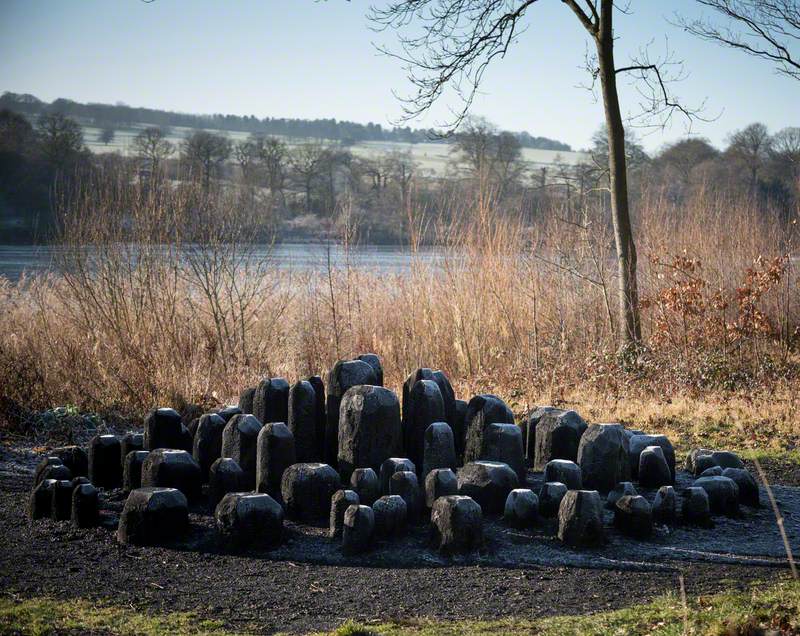
Multi-Cut Column 2000
David Nash (b.1945)
Split Frame: Crack and Warp Square
David Nash (b.1945)
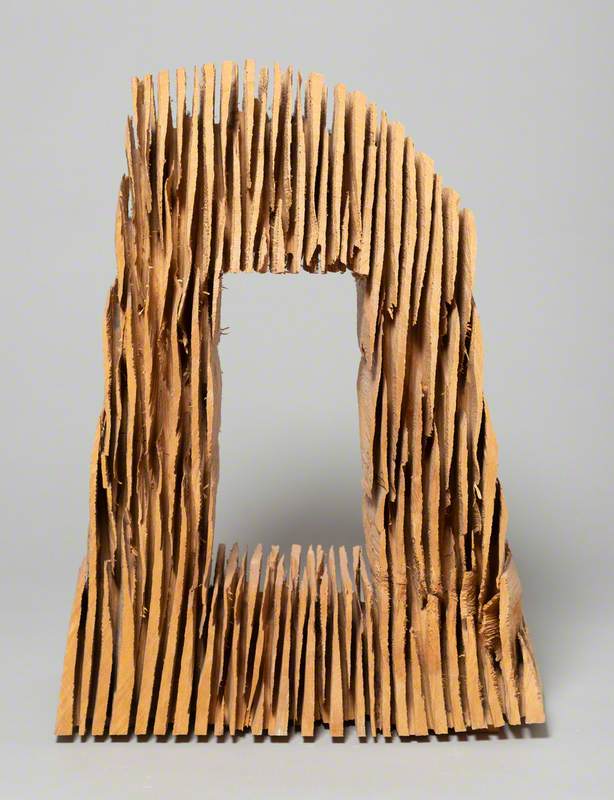
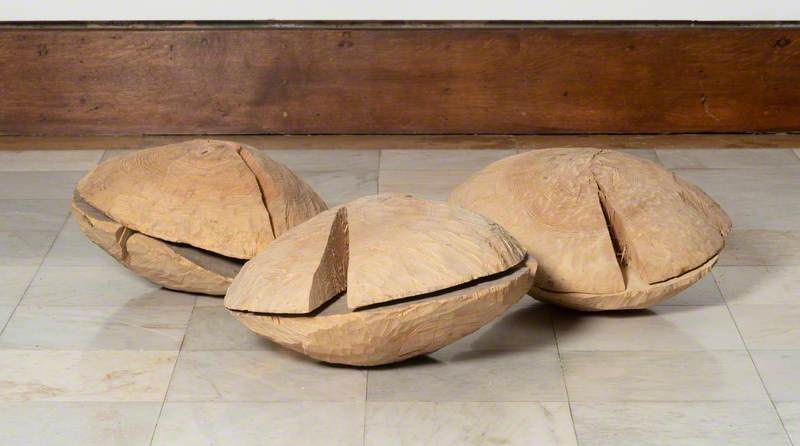
Enfolded Egg 1993
David Nash (b.1945)
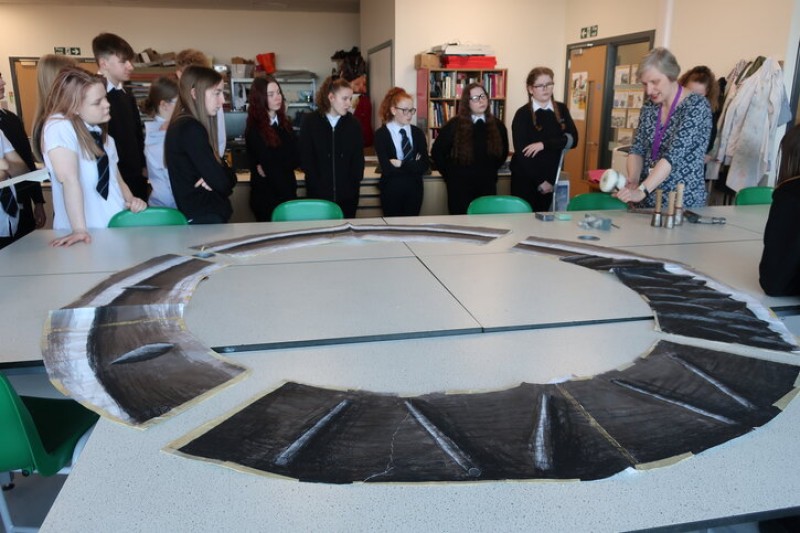
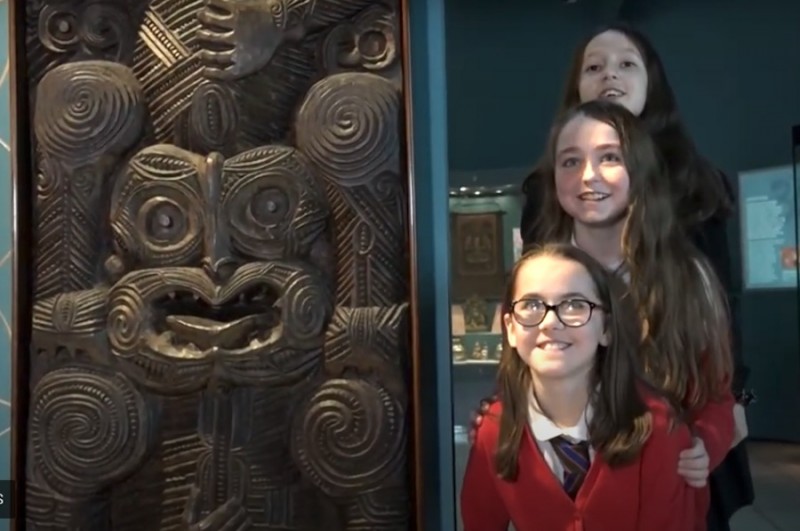
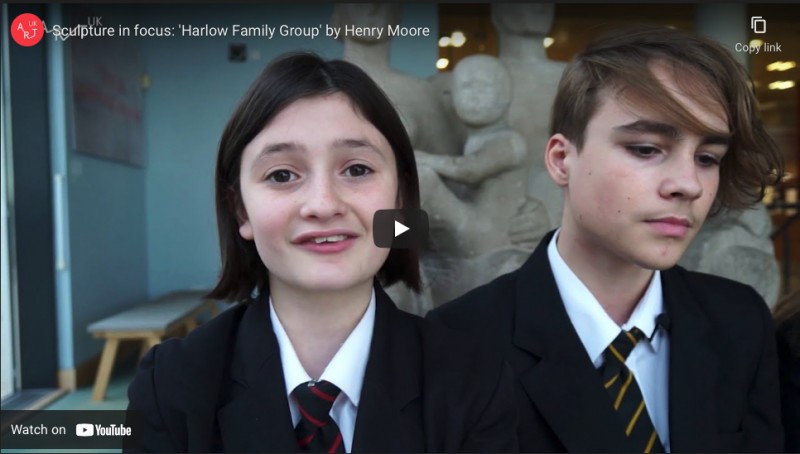
Activity: watch and discuss
Watch primary school students visit an exhibition of David Nash’s sculptures at Amgueddfa Cymru / National Museum Wales, then discuss the film as a class.
What do the students think about the sculptures?
What have they learnt about the artist and the sculptures from the film (what are the sculptures made from, what tools does the artist use)?
Did anything surprise them? (For example, this could be the size of the sculptures or how they were made.)
How different would the sculptures look if they were in a landscape rather than a gallery setting?
Look closer
Shapes and textures
Although inspired by the landscape, David Nash does not create exact copies of what he sees around him but instead uses nature's shapes and textures as inspiration for abstract sculptures.
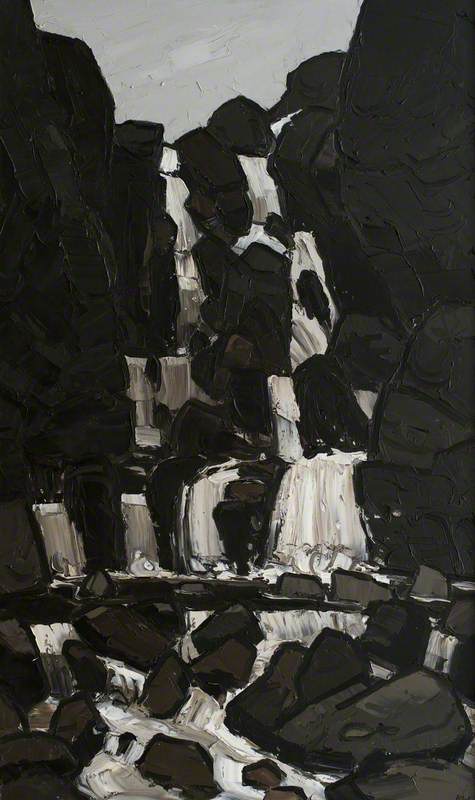
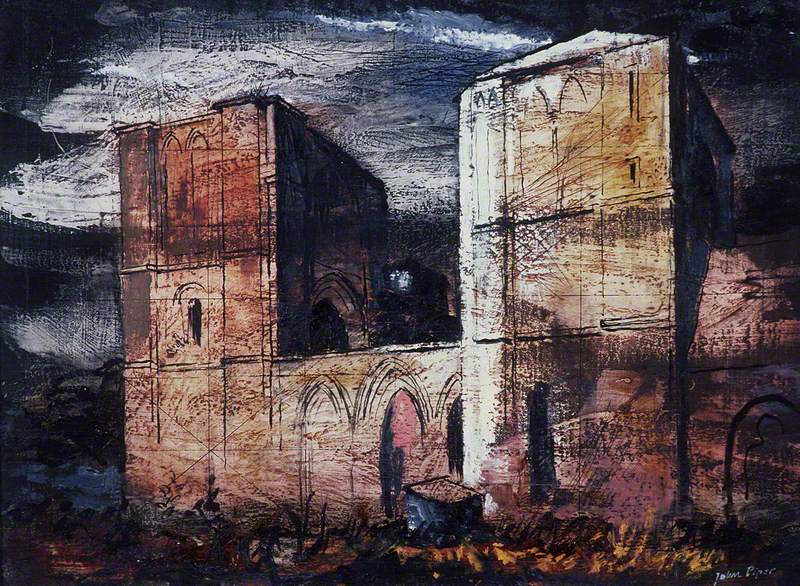
The sculpture looks a little like a tree trunk (with rough bark) but it also looks a like a river or waterfall flowing over rocks. You could compare the shapes and textures to this painting of a waterfall in the Welsh landscape by Kyffin Williams.
Most of David Nash's sculptures are made from wood. Discuss with students what they know about wood and some of its properties. For example:
where does wood come from?
is it natural or manmade?
what are some of its properties? (Is it soft or hard? Smooth or rough? Is it strong – what are some of the things we use wood for?)
We can see the forms and textures of the wood and the tree it came from in David Nash's sculptures. Ask students to think about how the forms of these sculptures might have been inspired and shaped by the forms of the trees that they are made from.
Can they spot the grain and knots of the wood?
Can they spot branches from the original tree?
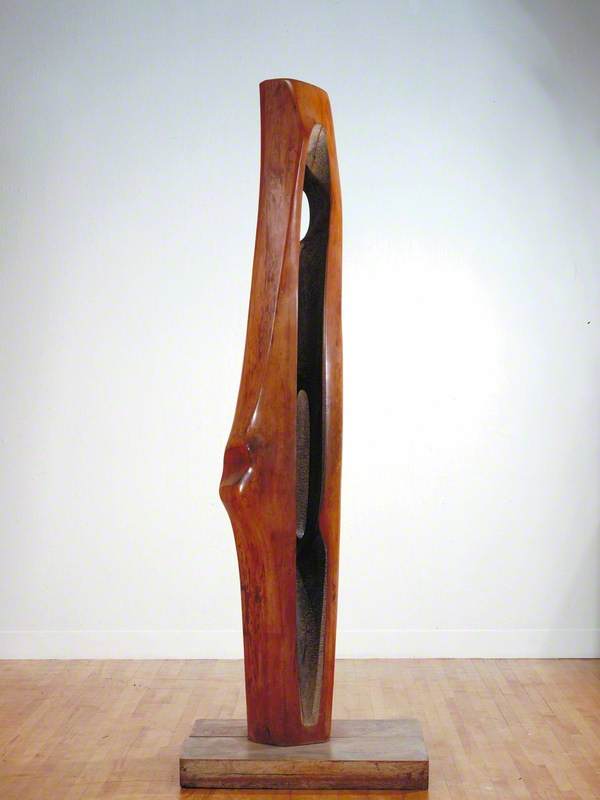
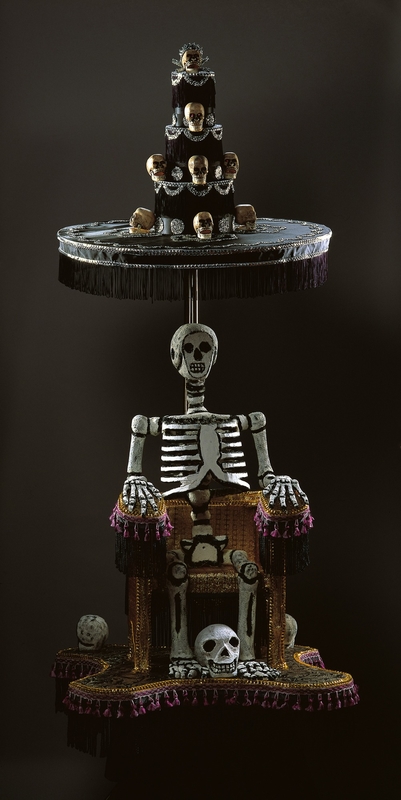
Wafer Throne 1989
David Nash (b.1945)
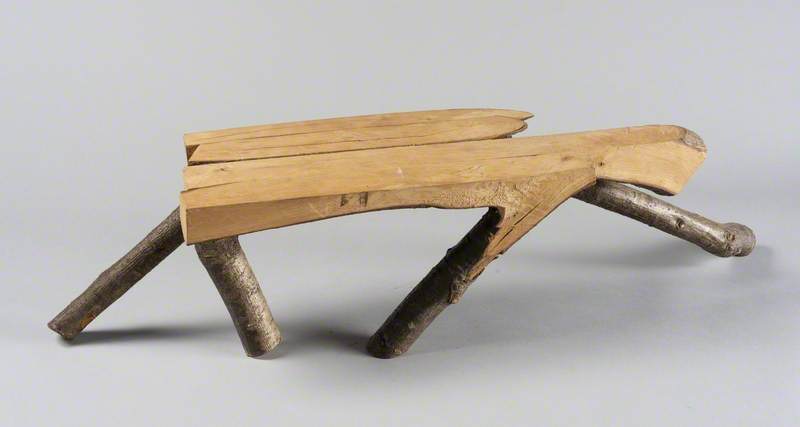
Running Table
David Nash (b.1945)
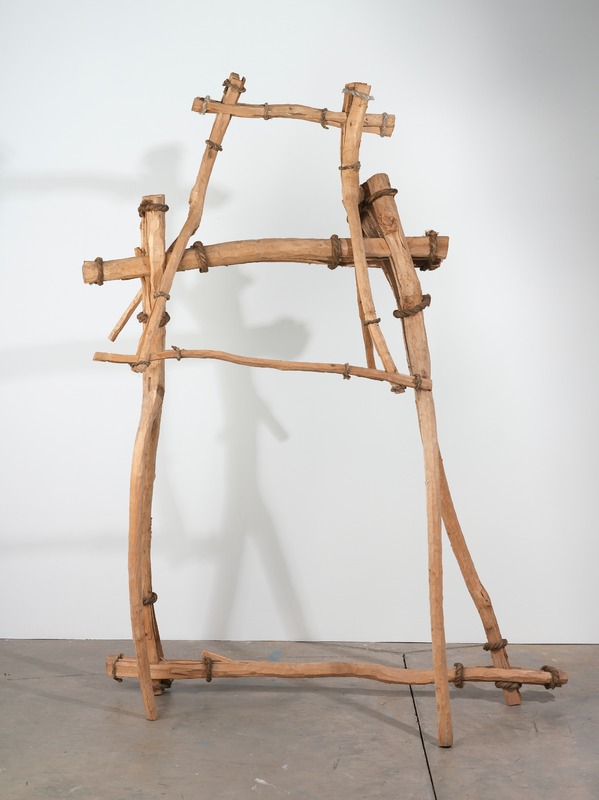
Split and Held Across 1971
David Nash (b.1945)
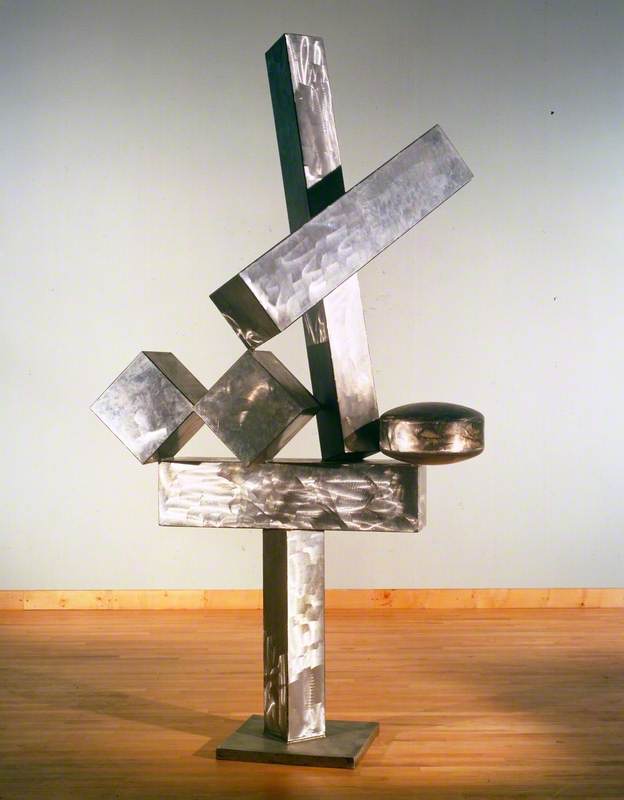
Wood vs metal
You could also ask students to think about how different the sculptures would look if they were made from metal. (It might be useful to have a wooden object and a metal object in the classroom for students to look at and touch.)
Do you think David Nash made the cracks on purpose or did the cracks happen naturally?
Do you think it matters that the wood has cracked? Does it ruin the sculpture?
Wood is usually seasoned before it is used in furniture-making or sculpture. This drying process removes moisture and prevents wood from warping or cracking.
David Nash uses the wood in its natural state which means that it cracks and warps, often after he has finished the sculptures. Rather than being worried about this, he embraces the natural changes that happen to his sculptures – sometimes over a period of years – and sees the resulting sculptures as a collaborative process between himself and nature.
For Nash, the cracks in this sculpture look like 'grins and chuckles' and become an essential part of the work.
Techniques
David Nash uses axes and saws (including a chainsaw) to create the forms and textures of his sculptures. He sometimes attaches pieces of wood together using wooden pegs or string. He also often chars his sculptures with a blowtorch to create blackened velvety surfaces. A chainsaw and blowtorch are not tools that we usually associate with making art!
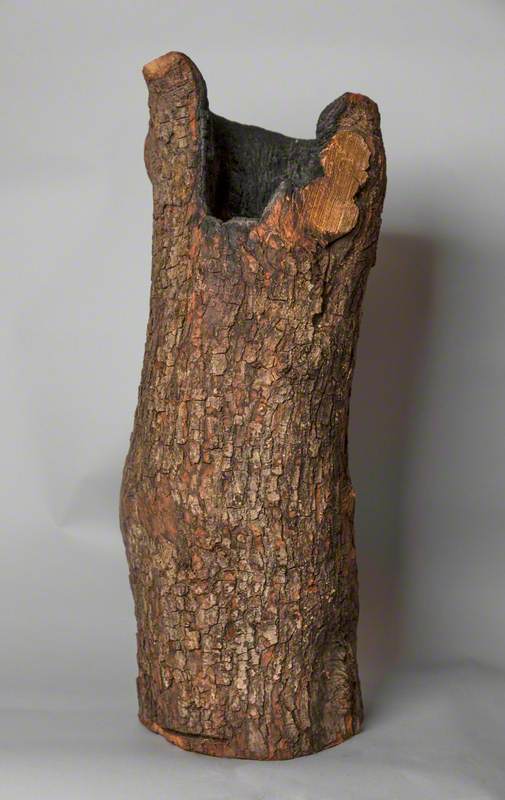
For this sculpture, Nash used a section of a tree trunk and left the bark in place. He has charred the inside of the sculpture to suggest a stove.
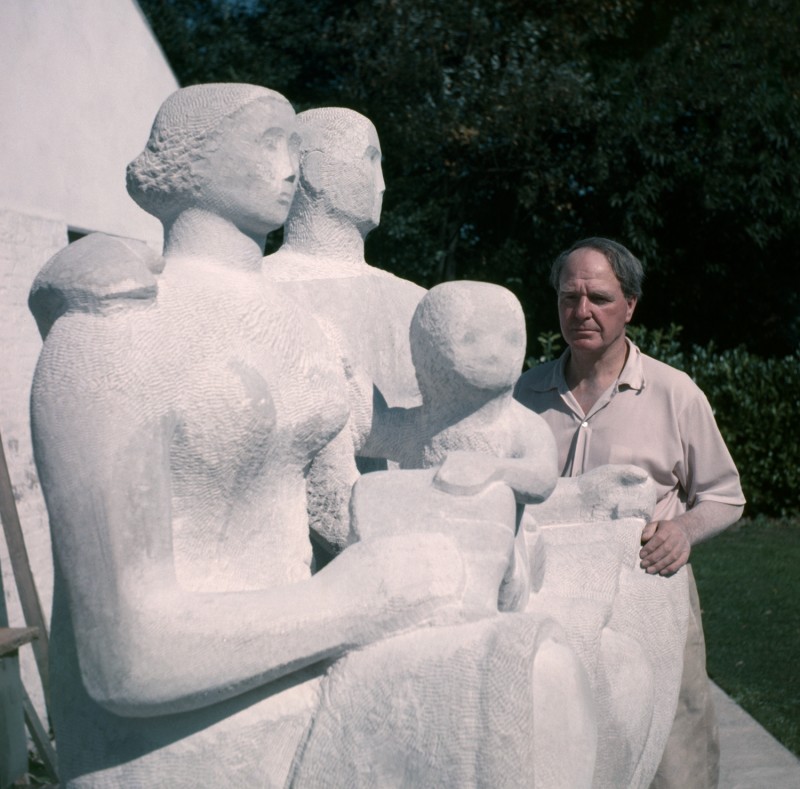
Both sculptures are made from wood and are vertical column-like shapes. But while Hepworth carved her sculpture to create its shape and smoothed and treated the surface, Nash decided to use the wood in its original form to emphasise its connection to the natural world.
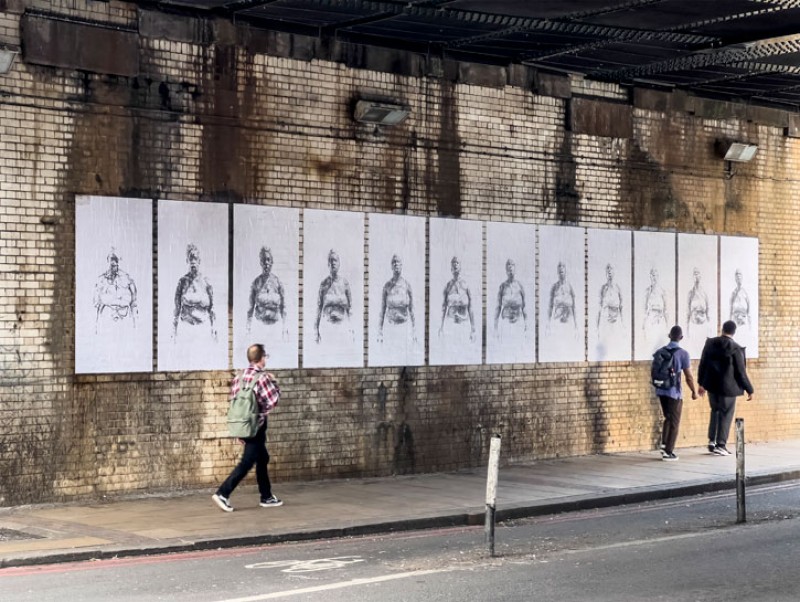
Activity: draw shapes and textures from nature
'Marks on paper, lines and smudges, an idea looking for a form or just a notion needing clarity. A fine graphite line, a thick charcoal line, a cloth pad loaded with pigment. Whatever the method there's truth for the hand to learn in the medium and truth to the surface receiving it.' – David Nash
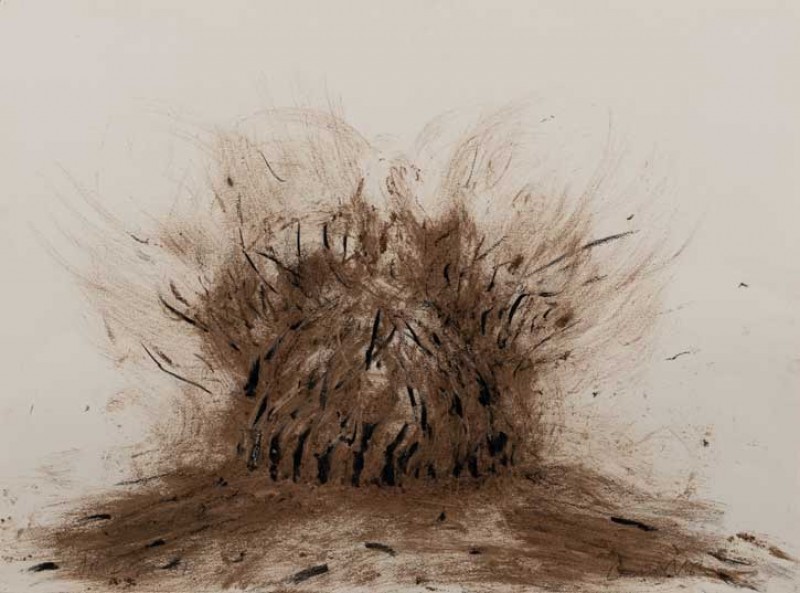
Alongside his sculptures, David Nash creates large expressive drawings. He sometimes draws trees or elements within the landscape and uses these to inspire the shapes and textures of his sculptures. He also draws his sculptures after he has made them, capturing how they change over time. This is a drawing of his outdoor, living sculpture Ash Dome.
Ash Dome
2007, drawing with earth on paper by David Nash (b.1945)
Objectives and outcomes
For this activity, students will make large-scale drawings of objects from nature using charcoal or chunky crayons, inspired by David Nash's drawings and sculptures. The activity will encourage students to look closely, practice hand-to-eye coordination and think about shapes and textures.
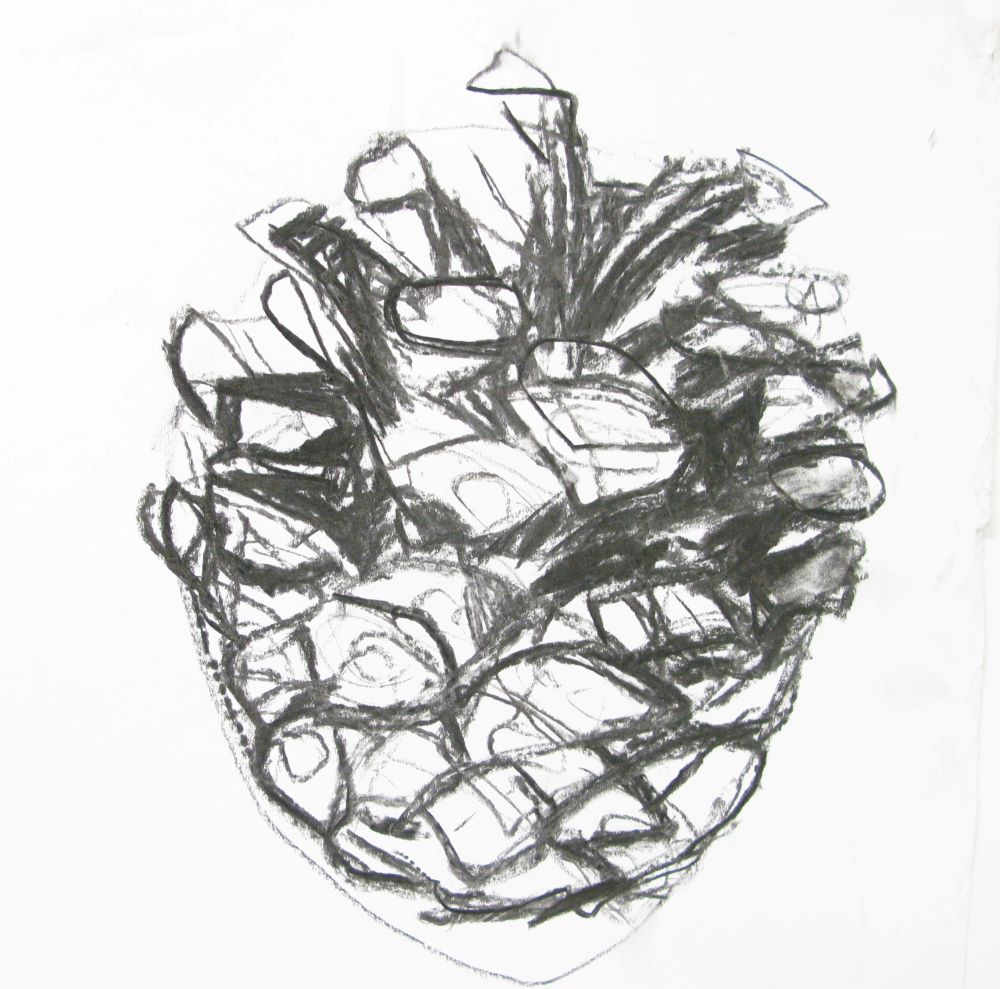
Charcoal drawing of a pine cone
Drawing with charcoal
Charcoal is a versatile, expressive drawing medium that can be used to make a range of marks and is great for making large drawings. It can be bought from any art or craft shop and comes in different forms. Vine charcoal (sometimes called willow charcoal) is made by heating twigs at a high temperature in a kiln. Compressed charcoal is made from powdered charcoal that has been mixed with gum or wax to hold it together forming a crayon-like stick. Compressed charcoal is also available in pencil form. Compressed charcoal is less brittle and more robust than vine charcoal so it may be easier for students to use.
If your students haven't drawn with charcoal before, it might be helpful to practice using it first. Encourage them to experiment with different lines and marks. They could have a go at making quick heavy, expressive lines, slower, light and delicate lines; dots and dashes, squiggles and scribbles; laying the charcoal on its side to create a wide blurred mark; and smudging the charcoal with their fingers, tissue or a bit of cloth.
Teachers' note: Charcoal can be a messy medium! Make sure students are wearing aprons or cover-ups and have access to a sink so that they can wash their hands afterwards. Tables should be covered with newspaper to collect any charcoal dust.
Materials
Students will need:
a large sheet of paper – at least A2 size (sugar paper, cartridge paper, lining wallpaper or brown wrapping paper would be fine)
charcoal or chunky wax crayons
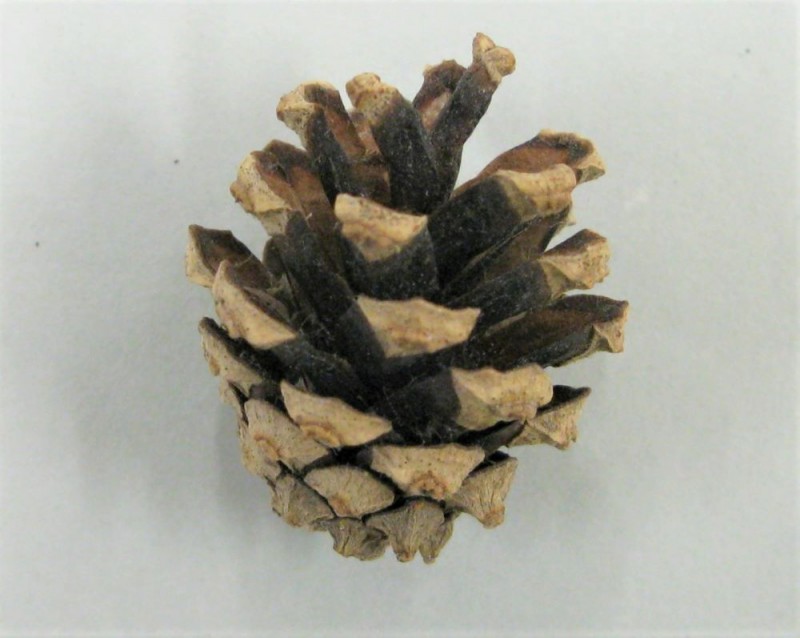
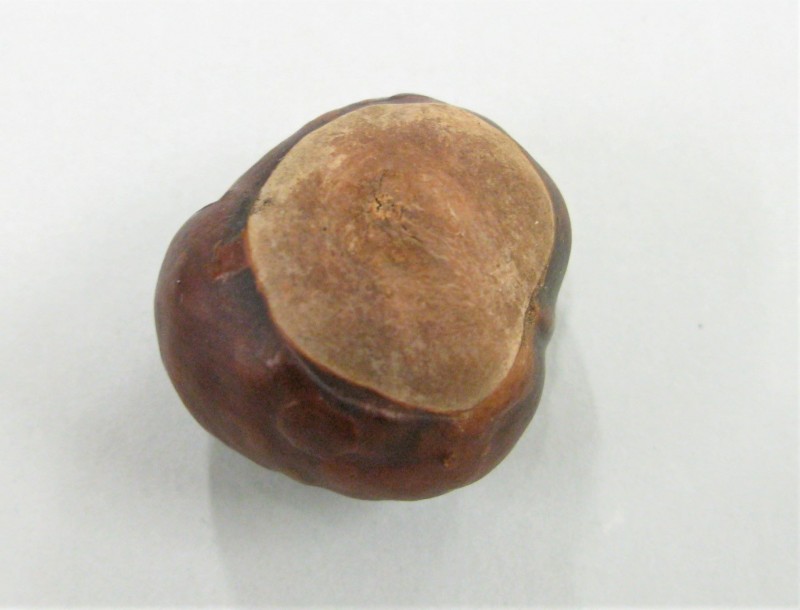
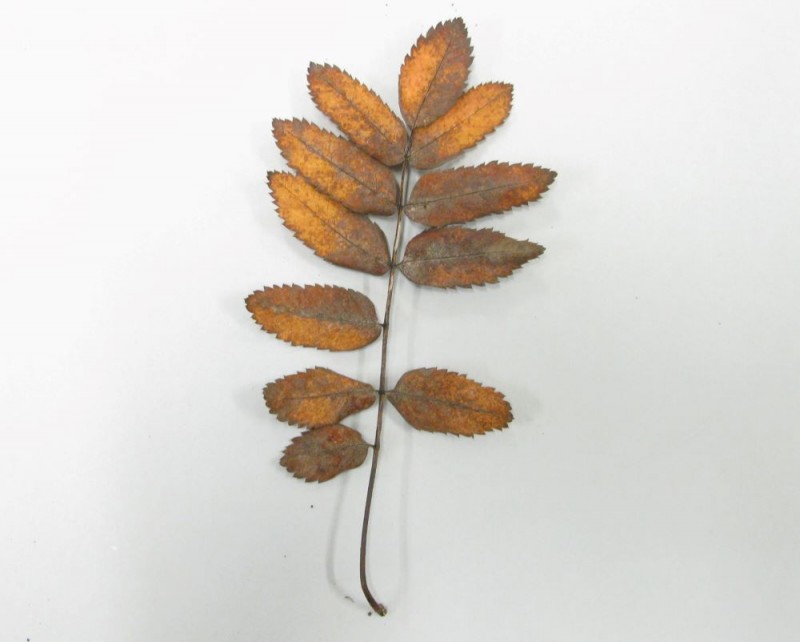
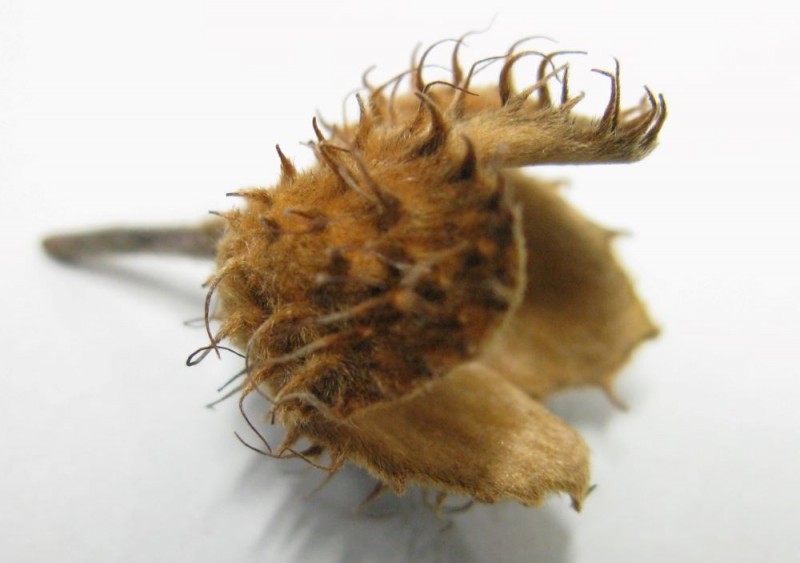
natural objects to draw (e.g. pine cones, acorns, conkers, leaves, gnarly sticks or twigs, tree roots, rocks
If you live in a rural area or near a park, you could take students outside to draw shapes that they see in the landscape.
Method
Research and ideas
Before students start drawing, have a look at drawings by David Nash and bold charcoal drawings by other artists who have been inspired by nature, in the slideshow below.
Discuss the drawings as a class. Ask students to think about the qualities of the drawings, e.g. how the artists have used the materials, how they have created the forms and textures, whether the drawings are simple or detailed, and words they might use to describe the drawings.
Ash Dome
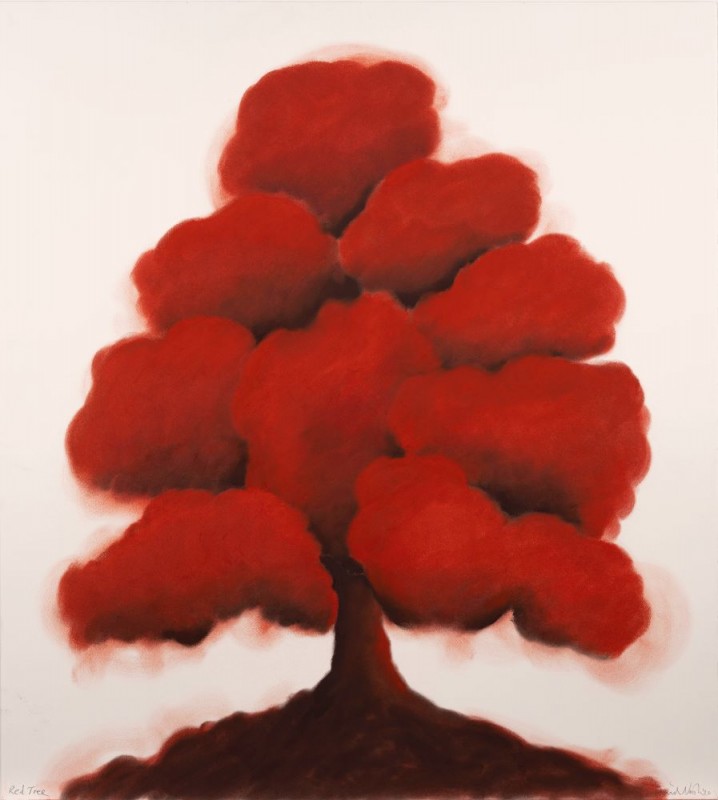
Red Tree
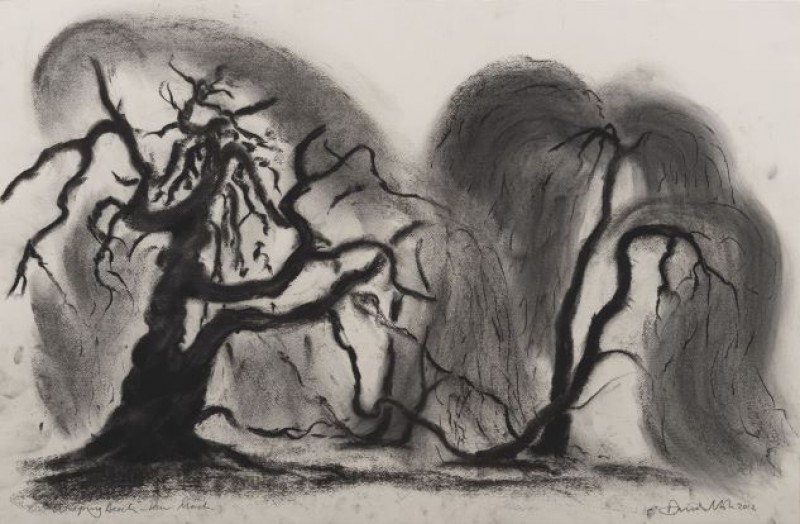
Weeping Birch, Kew, March
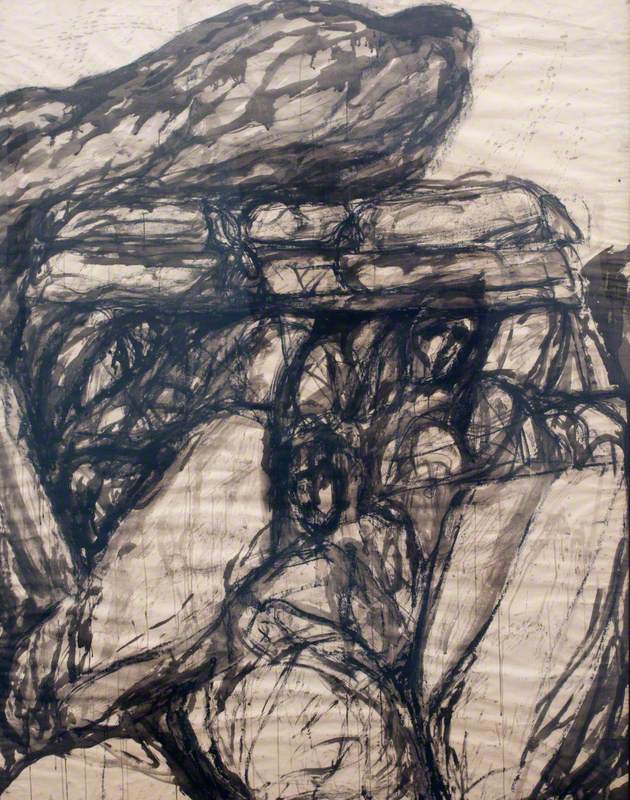
Rocks
Pat Semple (1939–2021)
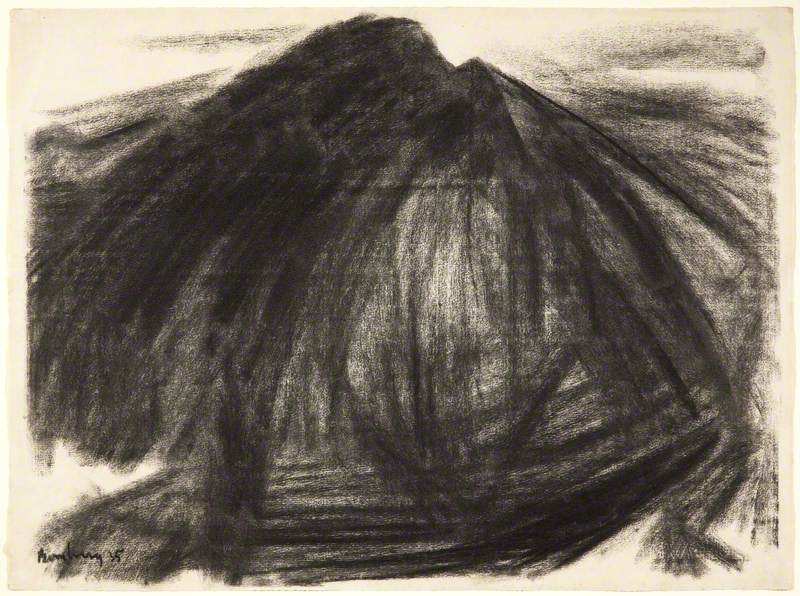
Picos de Europa, Asturias 1935
David Bomberg (1890–1957)
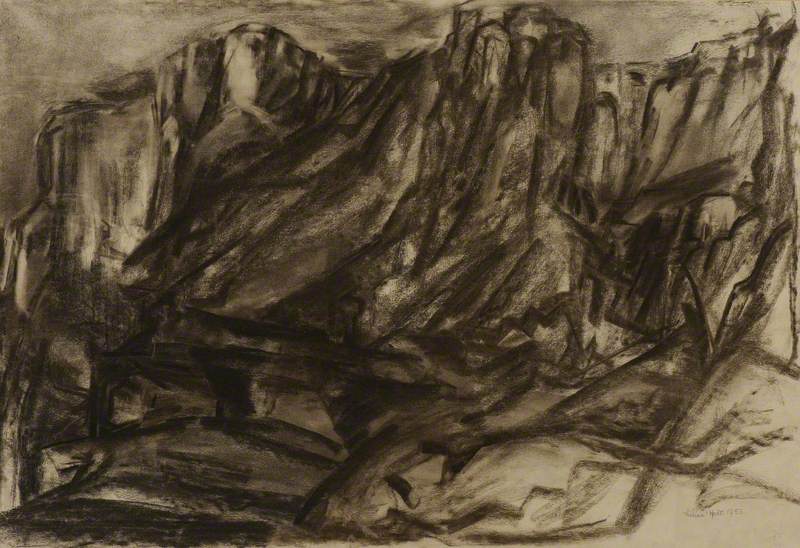
Ronda and Tajo 1956
Lilian Holt (1898–1983)
Step 1: choose a subject Students should choose an object from nature that they would like to draw. (It may be easier to assign students with an object – two or three students could share the object.) Work on the floor if there is not enough room on the tables.
Source objects from nature
If you are drawing outside, ask students to choose a single aspect of nature – such as a tree, rock or hill rather than trying to draw a whole landscape. It might help to make a viewfinder to do this.
Make a frame from paper to help you focus on a subject
Step 2: look closely Before starting their drawing instruct students to look carefully at the shape of the object and think about its surface, noticing any textures. You could time students for one minute of looking before they draw, or ask students to talk about the shape and texture of their object before drawing it.
Pine cone
Conker
Leaf stem
Seed pod
Step 3: draw a big outline Draw a rough outline of the object first. Encourage students to draw big and fill their paper! (You could suggest that the drawing has to touch the edges of the paper.)
Step 4: add textures Students should then draw the details of their objects and any textures that they can see.
How can they translate these textures into marks using their charcoal or crayon? (This might involve making quick expressive marks, squiggly lines, dots and dashes or gentle shading.)
Encourage students to respond to what they can SEE and not what they THINK the object looks like. Encourage them to keep looking at the object as they draw, letting their hands and the charcoal follow and interpret what they can see into lines and marks.
Make it clear that the drawings aren't supposed to be neat and exact, the drawings should reflect their response to the shape and textures of the object.
Charcoal drawing of a pine cone
Charcoal drawing of a conker
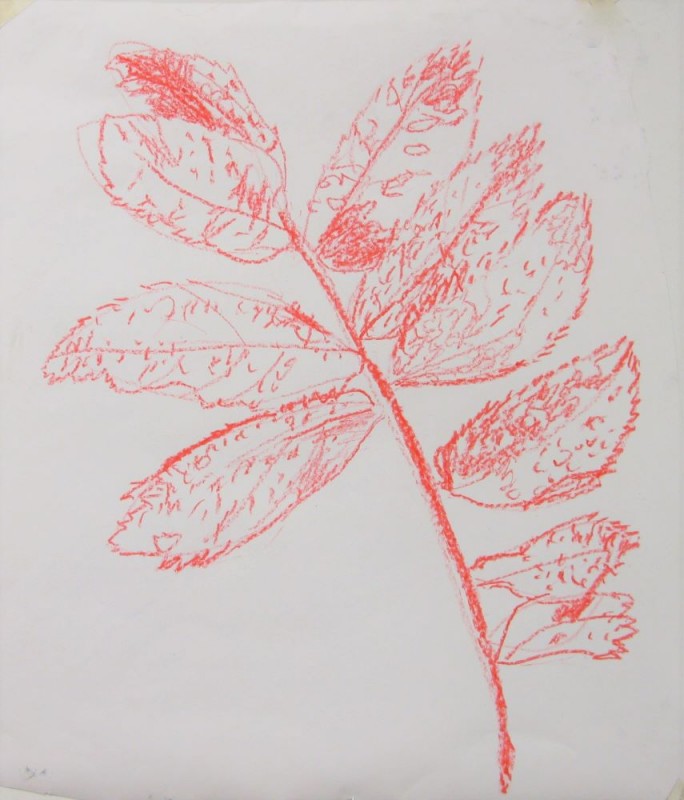
Crayon drawing of a leaf stem
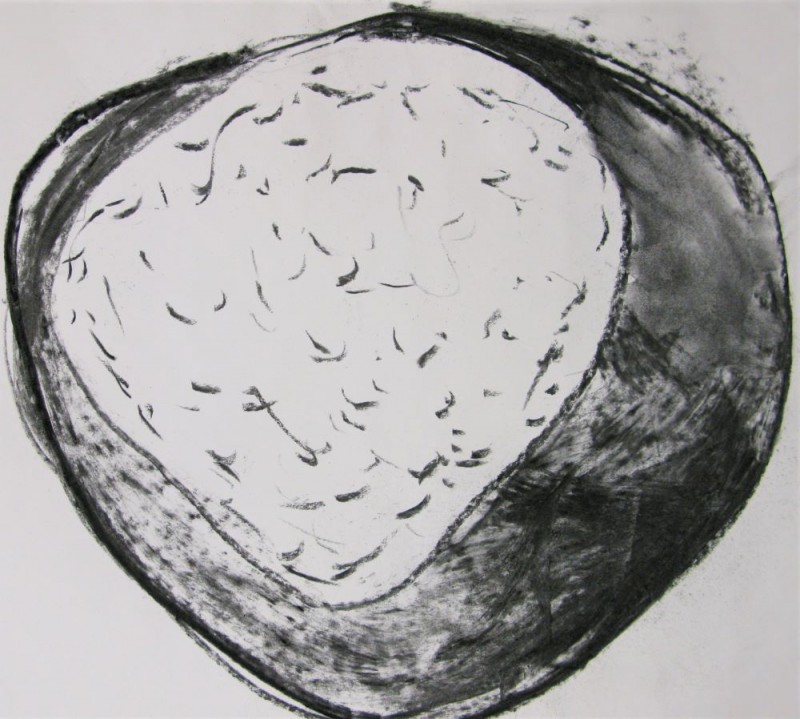
Charcoal drawing of a seed pod
Step 5: review drawings as a class
Once students have finished, look at the drawings together as a class. Ask students to think about their own drawing:
have they captured the quality of the object?
what do they like about their drawing?
what did they find difficult?
what they would do differently next time?
Activity: make a texture collage inspired by Nash and nature
Objectives and outcomes
For this activity, students will make a collage using textured rubbings and drawings inspired by nature and by the shapes of David Nash's sculptures.
The activity provides opportunities for students to explore shapes and textures and to experiment with materials and the techniques of collage and mark-making.
Materials
Students will need:
objects with textured surfaces (ideally natural ones such as wood, bark, leaves, rocks, and slate)
Try and choose objects that are flat but with a bumpy surface as these will be easier to make rubbings from. (You could also head outside to create textures from trees, rocks and other surfaces.)
paper for making textures
Use recycled papers such as paper bags, envelopes, newspaper, the back of used wrapping paper, used printer paper, etc. Don't worry about any existing text on the paper, this will add to the textures and make the artworks even more interesting!
heavier paper for the collage backing (e.g. cartridge paper, sugar paper, or you could cardboard recycled from an old box)
soft pencils and/or wax crayons
glue stick or PVA glue
scissors
Method
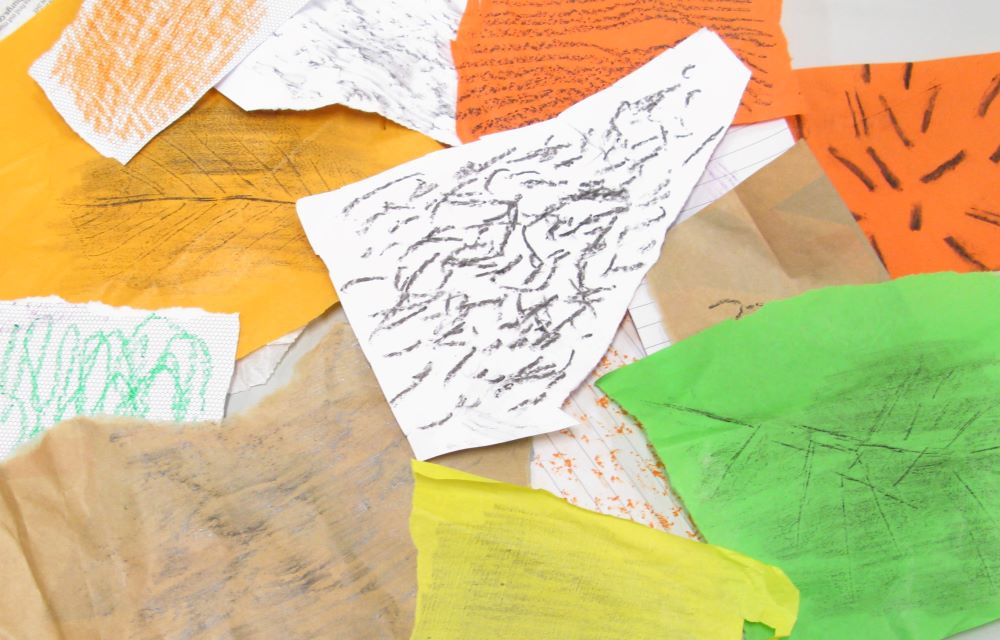
Step 1: create a bank of textures
Task students with creating a bank of textures to use for their collages. (This could be a homework task set in preparation for the lesson.)
Texture rubbings and drawings
The textures could be rubbings. To make a rubbing, place paper over the textured surfaces of objects and then scribble lightly with a crayon or soft pencil over the surface (see this video – 'Make a nature rubbing' – for tips). If using a pencil, scribble with the pencil slightly on its side, so that the side of the nib rather than the point is used. Using thin paper might help capture the subtle textures.
Or, use crayons and soft pencils to draw textures inspired by the textures you see. Experiment with your drawing materials and the marks you can make with them. How can you use marks (such as squiggly lines and dots) to suggest different textures from nature?
Use a range of paper for your texture drawings and rubbings. You could also use different coloured crayons for each texture.
Step 2: shape inspiration
Use these sculptures by David Nash as shape inspiration.
Students should choose a sculpture that they like the shape of and make a simple large-scale outline drawing of the sculpture on heavier paper.
Multi-Cut Column 2000
David Nash (b.1945)
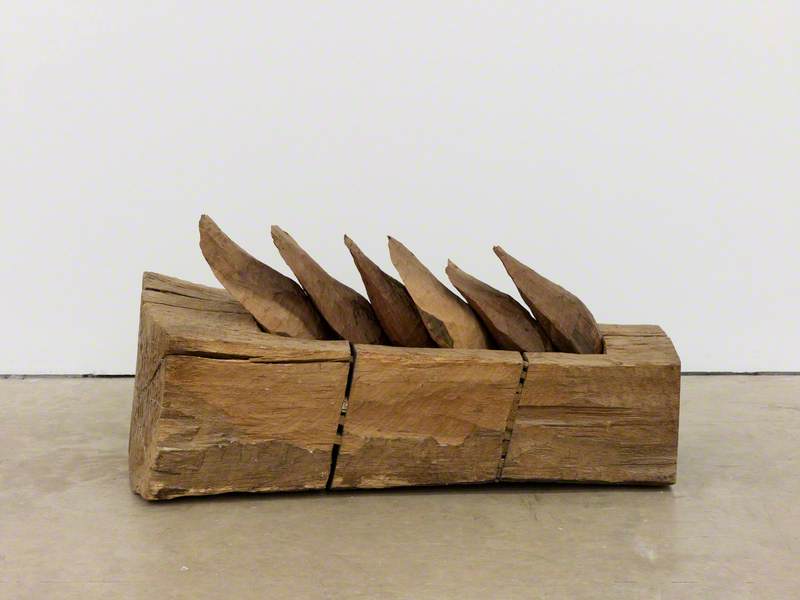
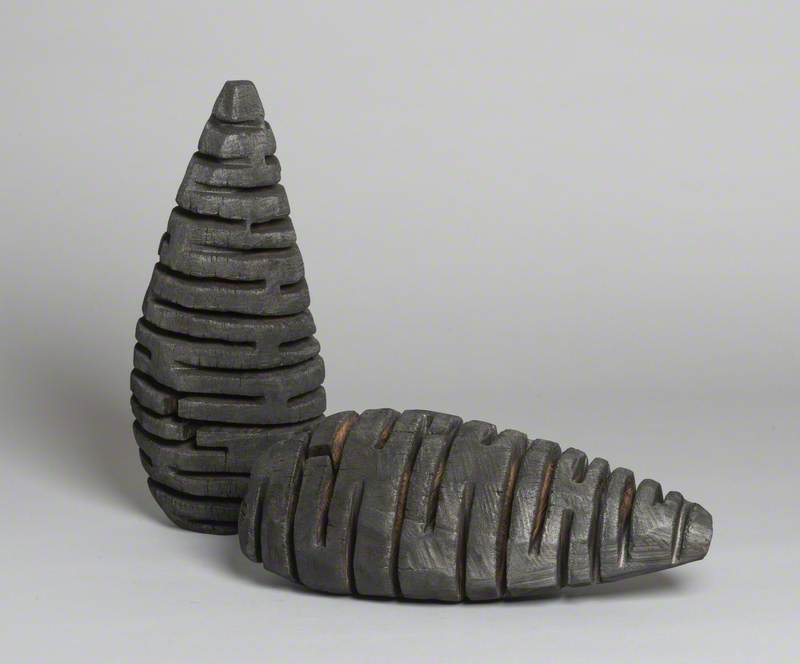
Pods in Trough 1975
David Nash (b.1945)
Enfolded Egg 1993
David Nash (b.1945)
Split Frame: Crack and Warp Square
David Nash (b.1945)
(It may be helpful to print out images of the sculptures for your students to draw from. Images can be downloaded from the artwork pages.)
Step 3: add textures!
Students should fill their drawn outline shape with texture drawings and rubbings from their texture bank. They could tear or cut the texture drawings to reflect any shapes within the sculpture.
Or they could cut out or tear interesting shapes and arrange them in a pattern (or randomly!).
They may need to cut the edge pieces of their textured drawings so that they fit inside the drawn outline of the sculpture.
Sculpture shape filled with textures
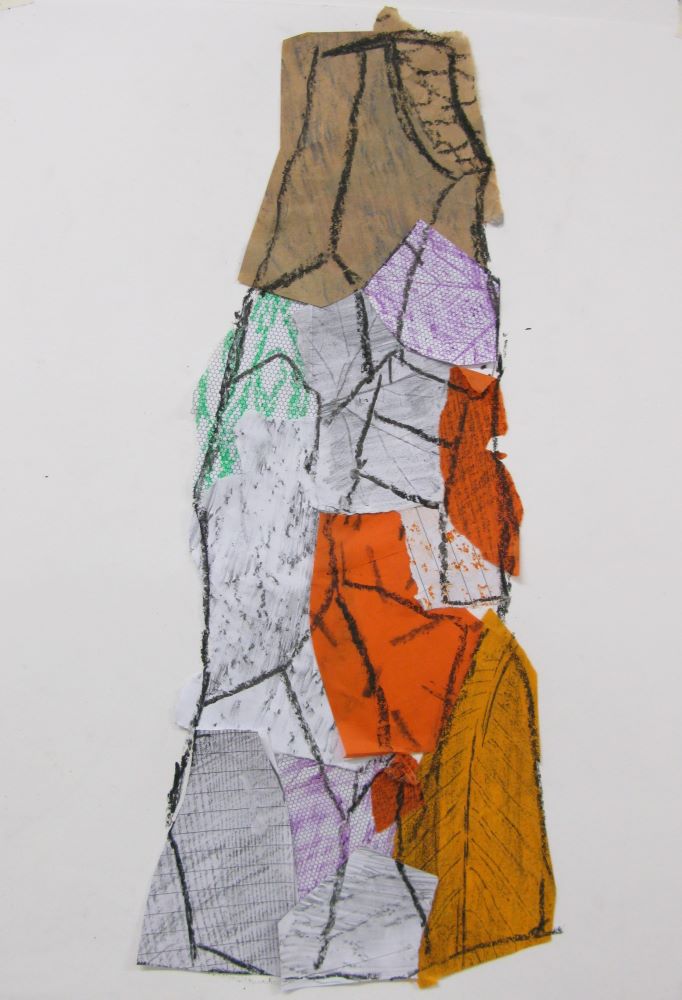
Step 4: work back into the drawings
Once the shape has been filled with collaged textures, students could work back into the drawings, re-defining the outline shape and adding the patterns and textures of the sculptures with a crayon. (These don't have to be detailed or exact – but inspired by the surface cuts and mark-making that David Nash uses.)
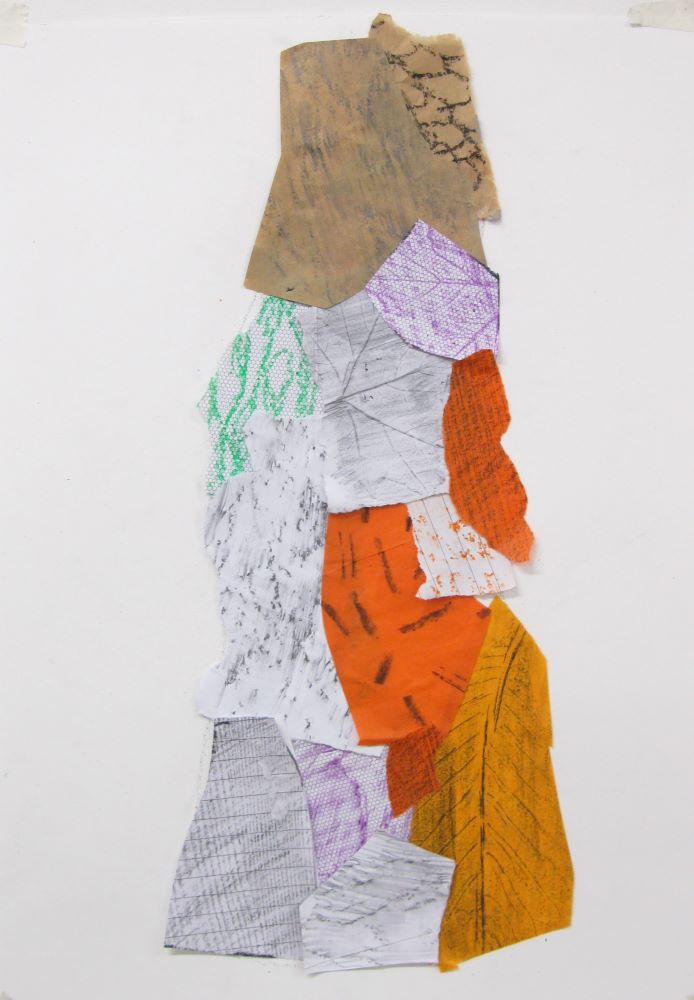
Textured collage inspired by David Nash's 'Multi-Cut Column'
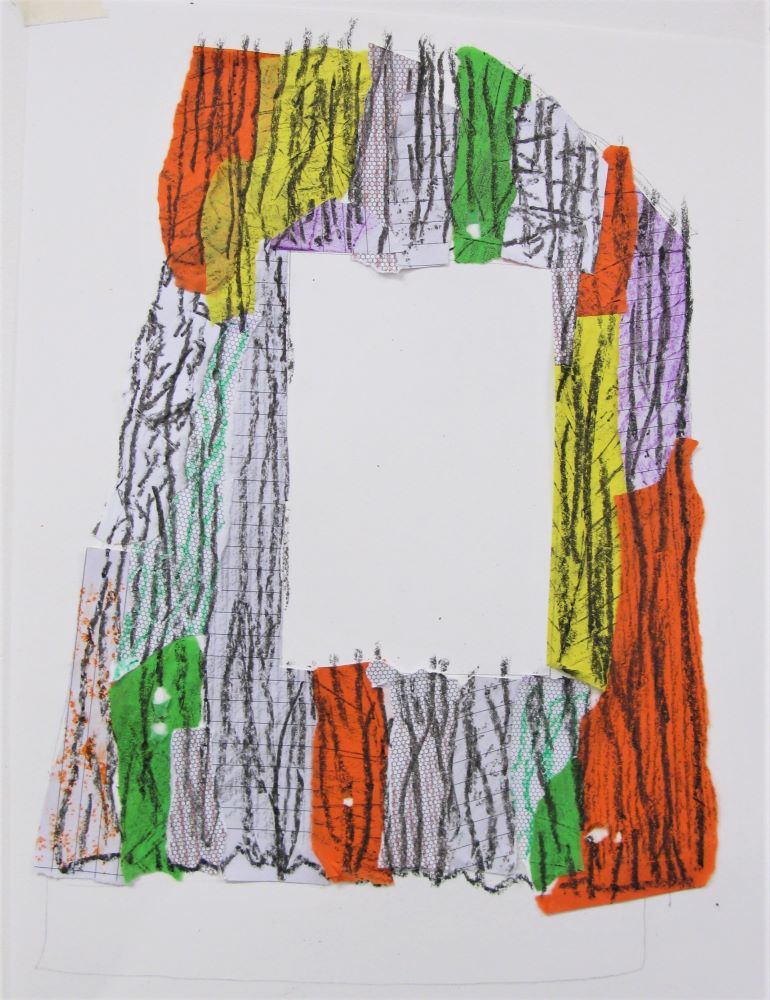
Texture collage inspired by David Nash's 'Split Frame: Crack and Warp Square'
Variations
As an alternative textured collage project, you could use objects from nature as the inspiration for your shapes, rather than David Nash's sculptures. Draw in the surface details and textures of the objects afterwards.
Extension activities
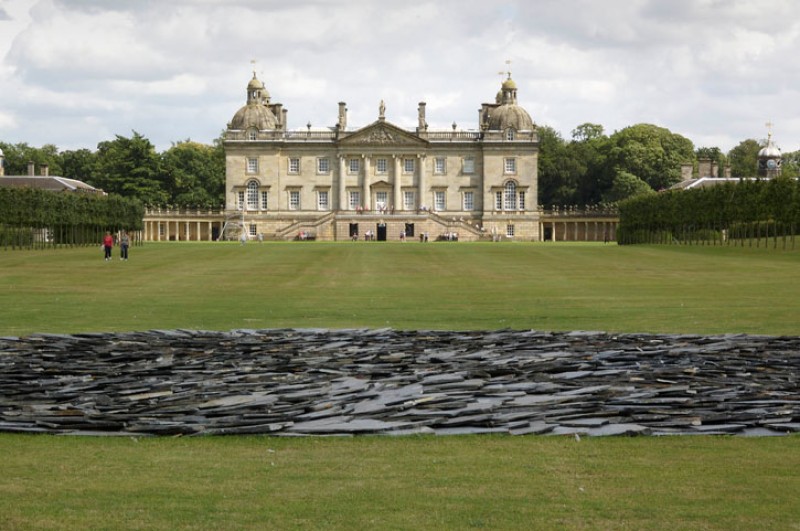
Explore Land Art
Alongside creating sculptures for indoor settings, David Nash also makes Land Art (art that is made from and exists in the landscape). He is interested in how environmental elements such as the weather, the light and the seasons as well as time and space affect and change the materials he uses.
'Making art outside is completely different from working inside... As soon as you go out there, you are dealing with slopes, wind, air, and rain. You are in another dimension. You are not necessarily in competition with it, but you are in it.' – David Nash
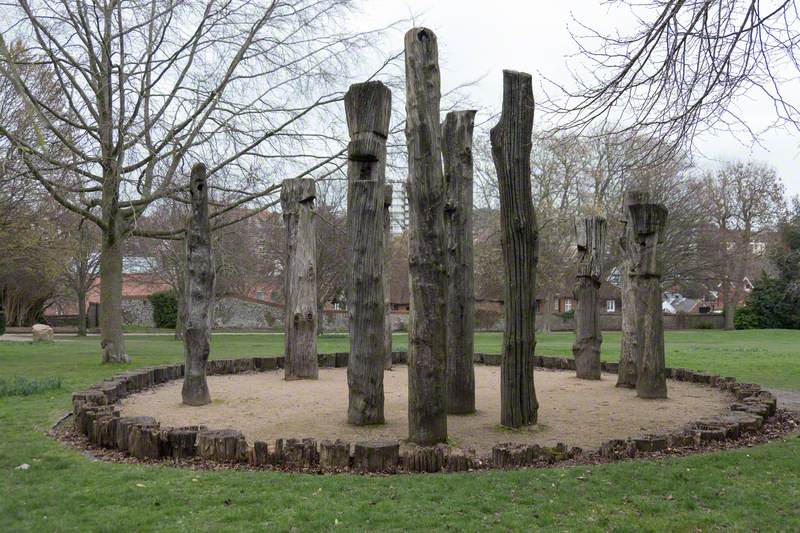
Explore these artworks by David Nash with your students and think about how they interact with the landscape and might change over time:
You could task students with creating a simple temporary artwork in the landscape. This could be a column or mound of stones or a line or shape from leaves or twigs. Their intervention might be inspired by shapes in the landscape or could change how we see and interact with the landscape.
In this resource, we explored some of the properties of wood. You could use this as a starting point for a deeper investigation of the properties of wood and a broader investigation of materials and their properties generally.
These video resources provide a general introduction to studying materials and their properties:
To explore the properties of wood in more depth you could discuss its weight, density, durability, whether it burns easily and whether it floats etc. Use these background links if helpful:
As well as the properties of materials you could also investigate how materials change over time and in different weathers. How different do they look in the rain and in the sunshine? What happens to paper over time? Does metal rust? What does plastic look like after a few weeks outside?