This activity shows you how to make a simple plaster sculpture using a clay mould. Students will make pebble-shaped sculptures that are decorated with simple relief motifs.
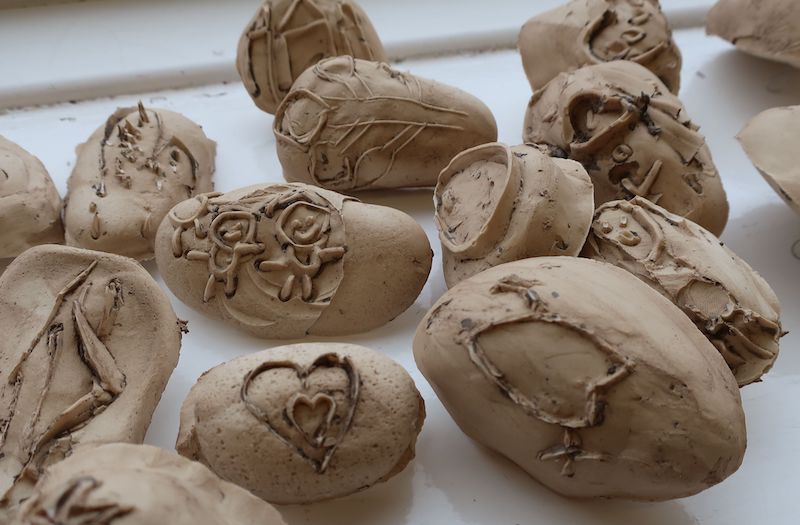
Task your students with planning and drawing a simple design.
This could be related to other subjects you are studying in the classroom – such as the seasons, the Vikings or Egypt. As the design will be incised into the clay it will need to be a simple motif or line drawing.
Step 2: make a mould
Give students a small slab or lump of clay each. This should be a little bigger than their pebble or stone.
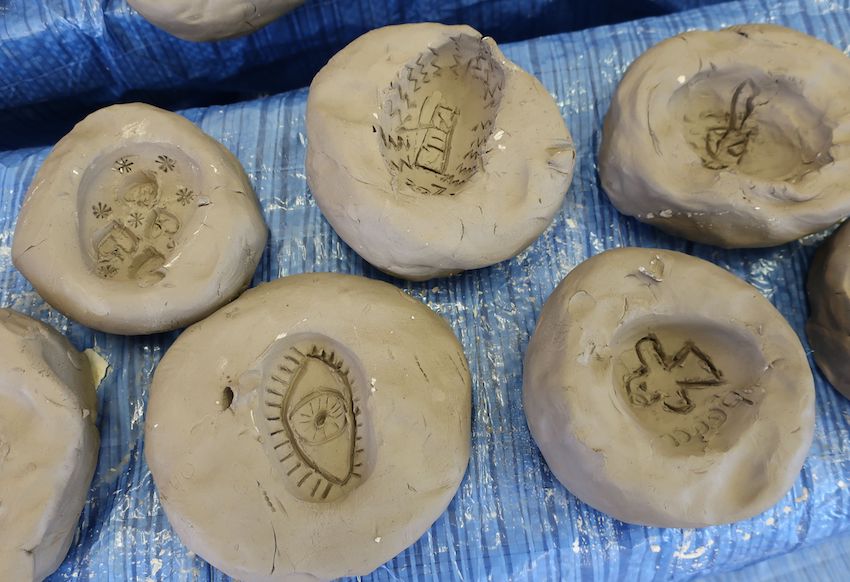
Instruct students to push the pebble or stone into the clay and then remove it to form a hollow.
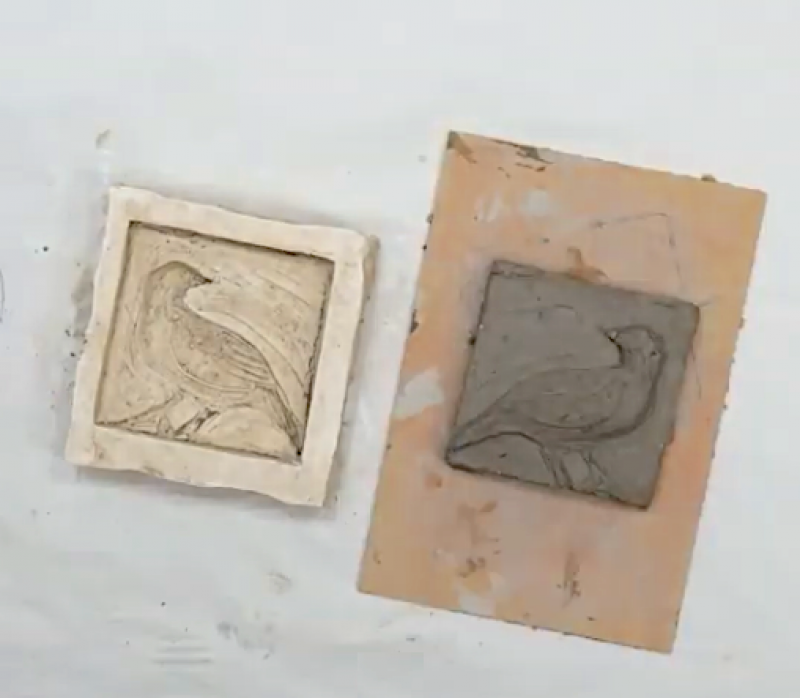
Using a clay tool or pencil, students can then draw their designs into the clay hollow.
Clay moulds with incised designs
Step 3: mix the plaster
As plaster can be messy with potential health and safety issues, this task should be undertaken by teachers. Make sure students are supervised at all times. Plaster dust can get into the eyes or nose so ensure that it is handled carefully and never mix or allow students to mix plaster with their hands.
The best ratio to use when mixing plaster is two parts water to one part plaster (you could use a paper cup to measure the quantities).
Measure the water into your bowl.
Gradually add plaster. Try to add it to different areas around the bowl so it doesn't build up in one place.
Tap the side of the bowl occasionally to disperse the plaster and get rid of any air bubbles.
You have added enough plaster when it stops disappearing into the water and sits on the surface (this is usually around the 2:1 ratio).
Now gently stir the mixture to make it smooth using an old spoon or stick.
Top tip! If you would like to add some colour to the plaster, add acrylic or poster paint at the stirring stage.
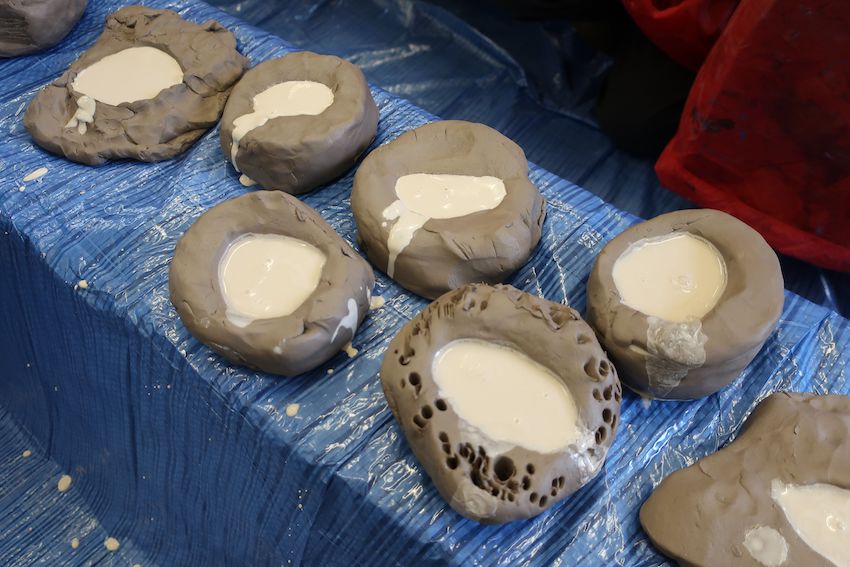
Step 4: pour the plaster into the moulds
Pour the mixed plaster into the moulds. If you are filling a few moulds at the same time, line the moulds up together.
Pouring plaster into the moulds
Leave the plaster to set. (You will notice that the plaster becomes warm as it sets.)
Caly moulds filled with plaster
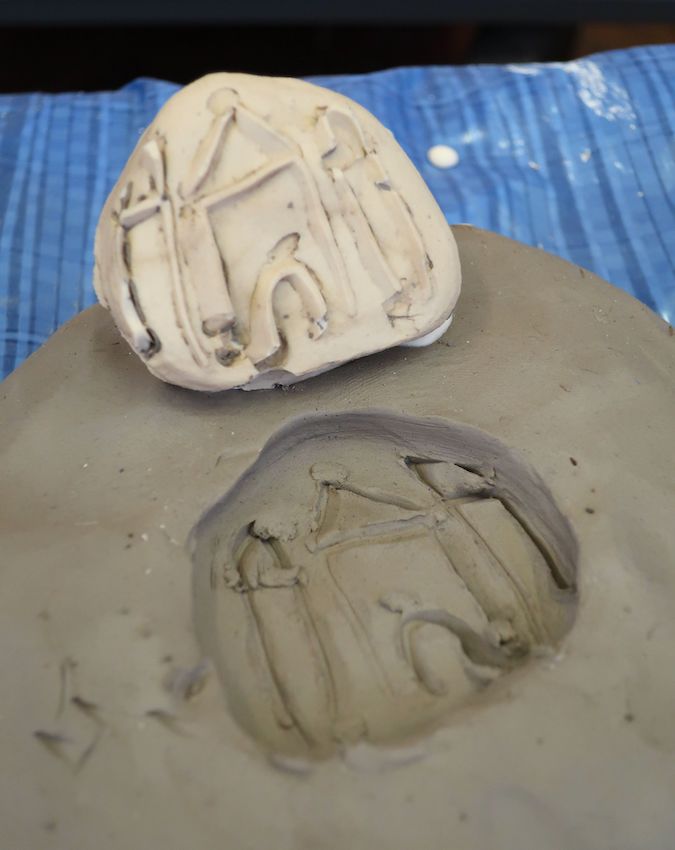
Step 5: reveal the finished sculptures!
When the plaster is hard and cool to touch, it is set.
Your students can now carefully peel the clay from the plaster to reveal their pebble relief sculptures.
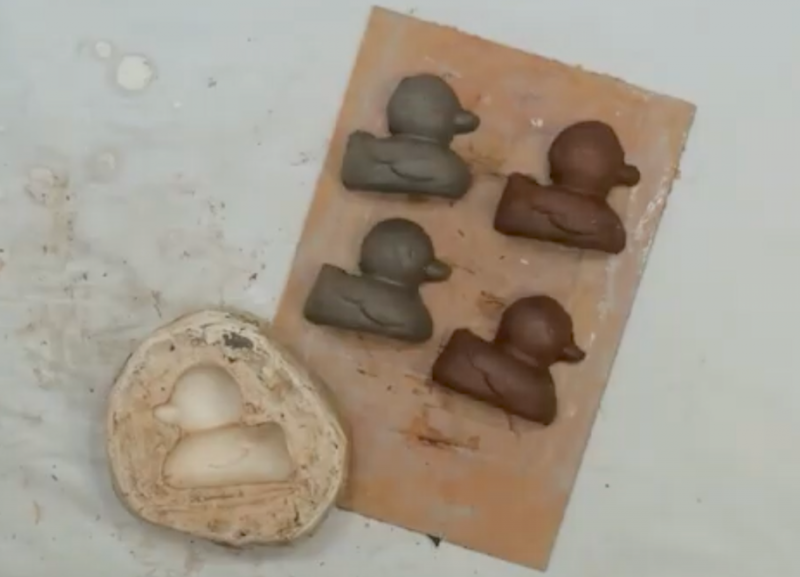
Finished sculpture with mould
Variations and differentiation
Use other hard objects to create different shaped hollows for your incised designs.
Older students could make more elaborate moulds from clay by incising or carving a more detailed design into their clay hollows.
You could also press shaped objects – such as plastic or rubber toys – into clay and fill these indents with plaster to form shaped sculptures.
Silicone is frequently used to make high-quality, detailed casts of objects. It is a safe material for students to use but is more expensive than clay.